Picturepath for schools user guide
- Home Screen
- Dashboard
- The Feedback Excel download
- Record feedback (Pupil’s timeline)
- Pupil Timeline (admin view)
- Add Routine
- Scheduling a routine
- Pupil timeline (admin view)
- Pupil Timeline (Pupil View – Now & Next)
- Pupil Timeline (Pupil View – Full timeline (horizontal))
- Pupil Timeline (Pupil View – Full timeline (vertical))
- Pupils Screen
- Activities Screen
- Add New Activity Screen
- Routines Screen
- View Routine
- Edit Routine
- Settings Screen
- Passcode Screen
- How to videos
1. Home Screen
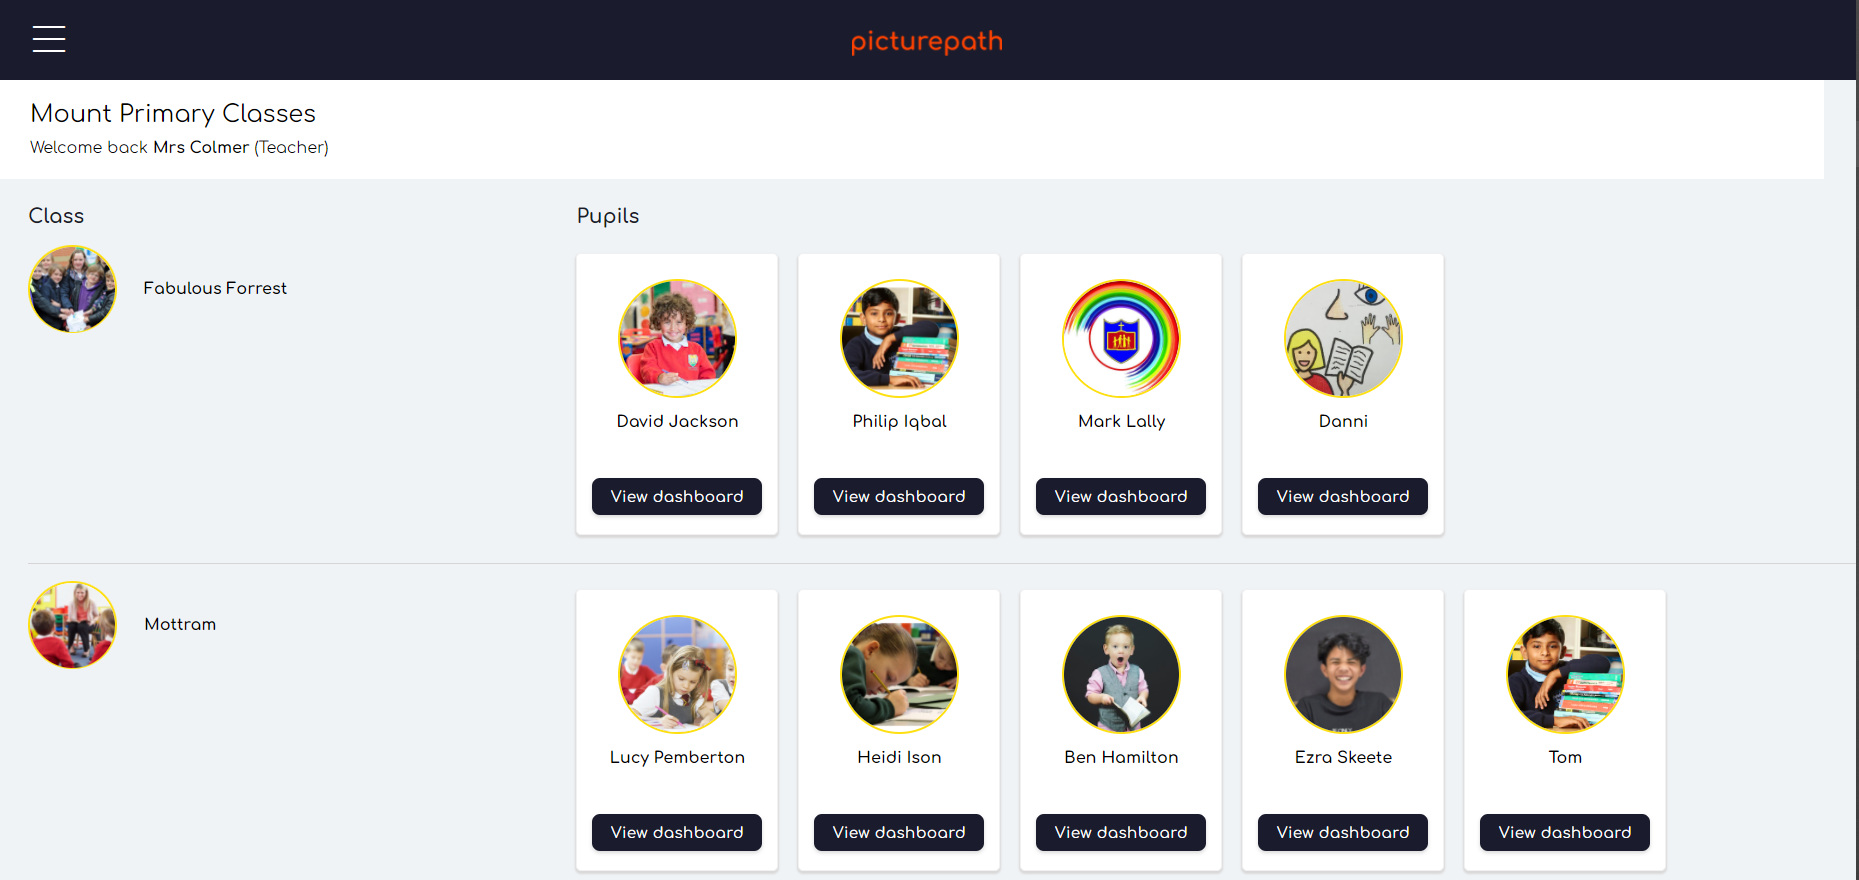
The home screen is available for the Teacher Login and is not currently available for the SchoolAdmin Login login.
The objective of the screen is to provide teachers with easy access to their class and student timelines as well as opening their Dashboards.
Through this screen you can:
- Access Class Timeline – Via the class picture
- Access Pupil Timeline – Via the pupil picture
- Access Pupil dashboards – Via the button
- Access the Main Menu – Via the burger button
2. Dashboard
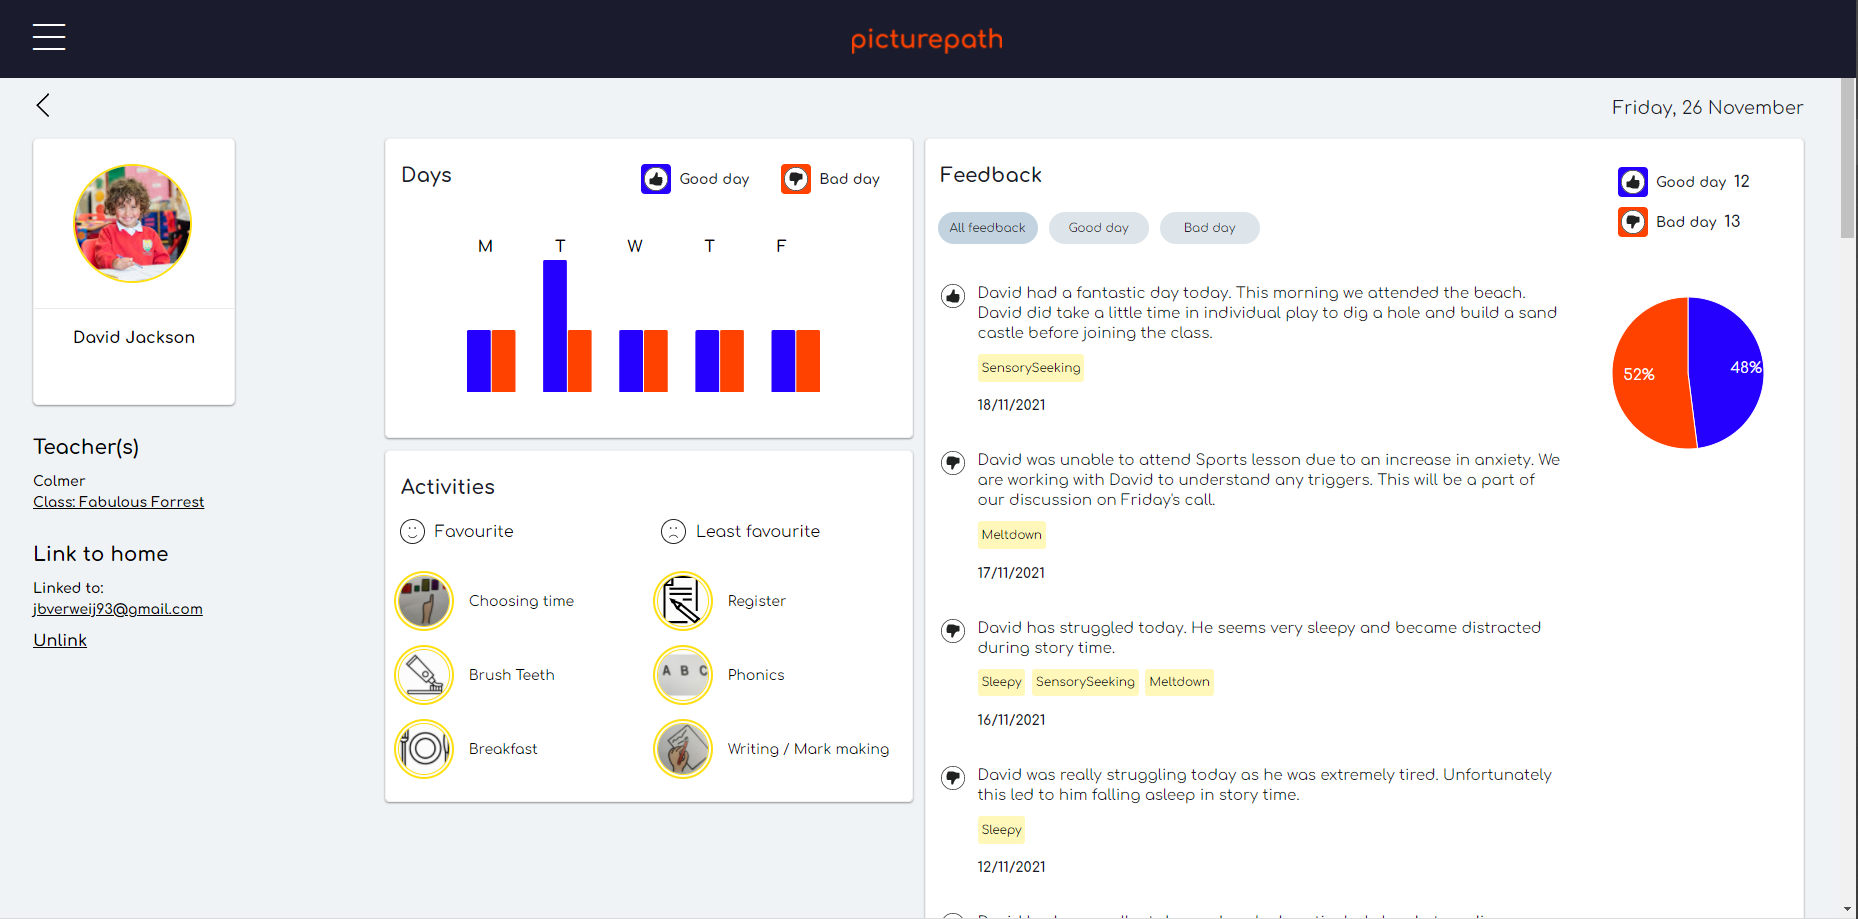
The dashboard screen is available for the Teacher Login and is not currently available for the SchoolAdmin Login login.
The objective of the screen is to provide a holistic view of a pupil’s experience at school. Representing the views of school staff and the voice of the student.
Through this screen you can:
- Access the Pupil timeline – Via image of child
- Access the class timeline – Via class name
- Link the school timeline with the home timeline
- Review school feedback – right hand panel
- Review favourite and least favourite activities – Top middle panel
- Download excel version of the report – button at bottom of feedback
3. The Feedback Excel download
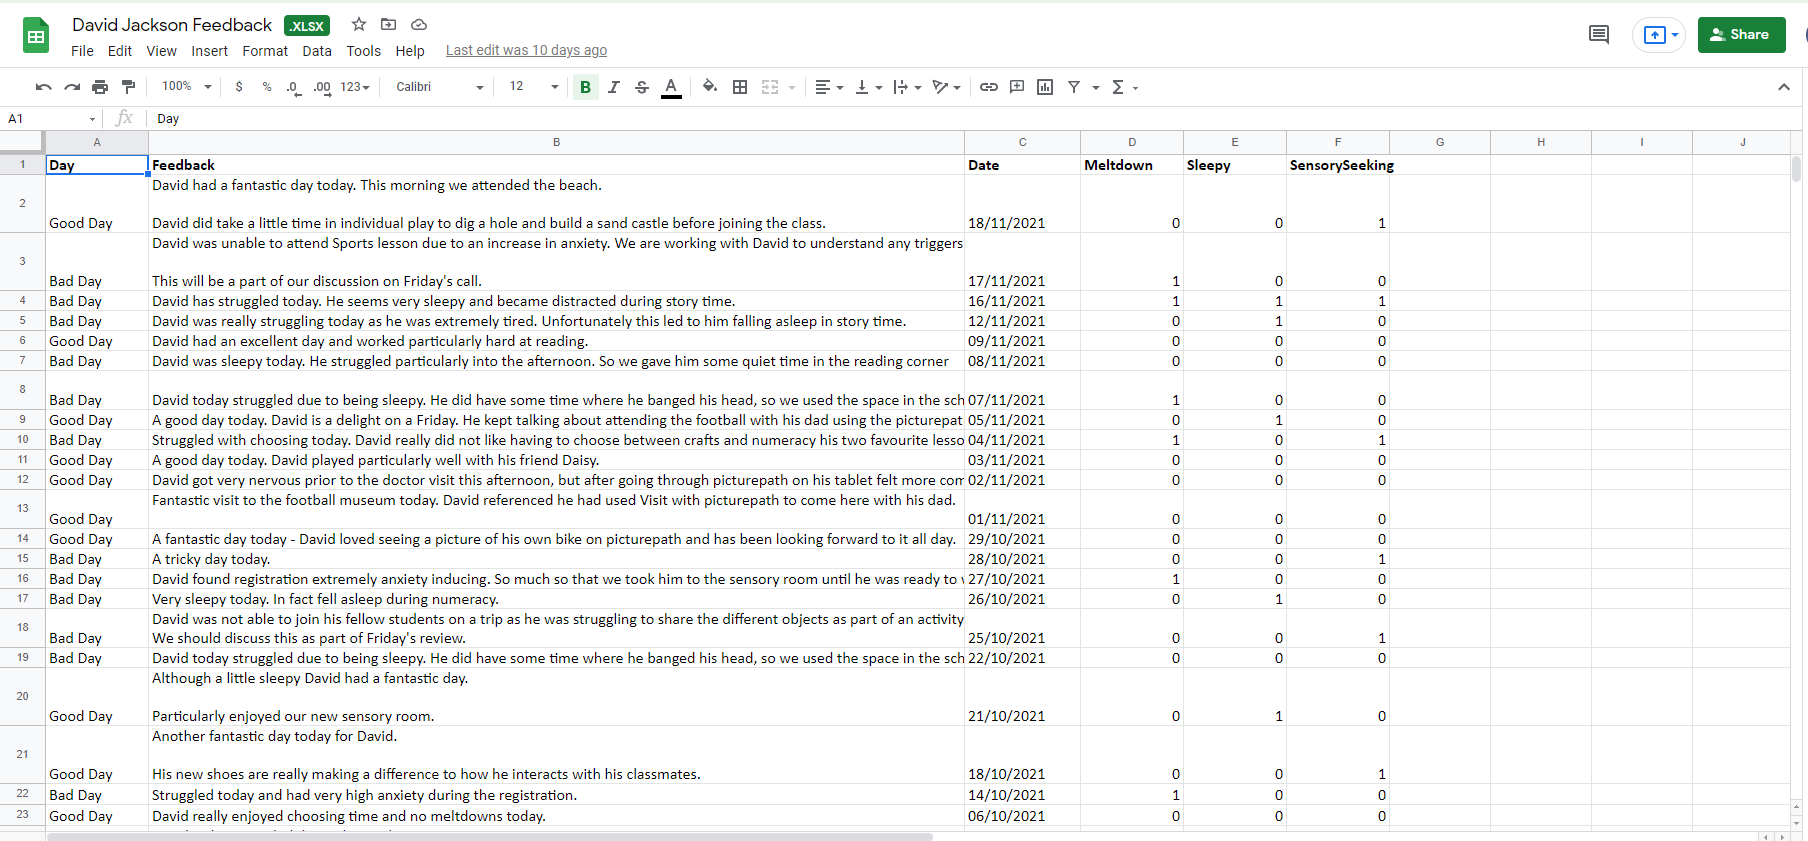
The Excel download is available for the Teacher Login and is not currently available for the SchoolAdmin Login login.
The Excel download will include:
- Good day / Bad day
- Feedback (the summary written by the the teacher)
- The date that the feedback was written
- If there were any key events recorded including:
Meltdow
Sleepy
Sensory Seeking
4. Record feedback (Pupil’s timeline)
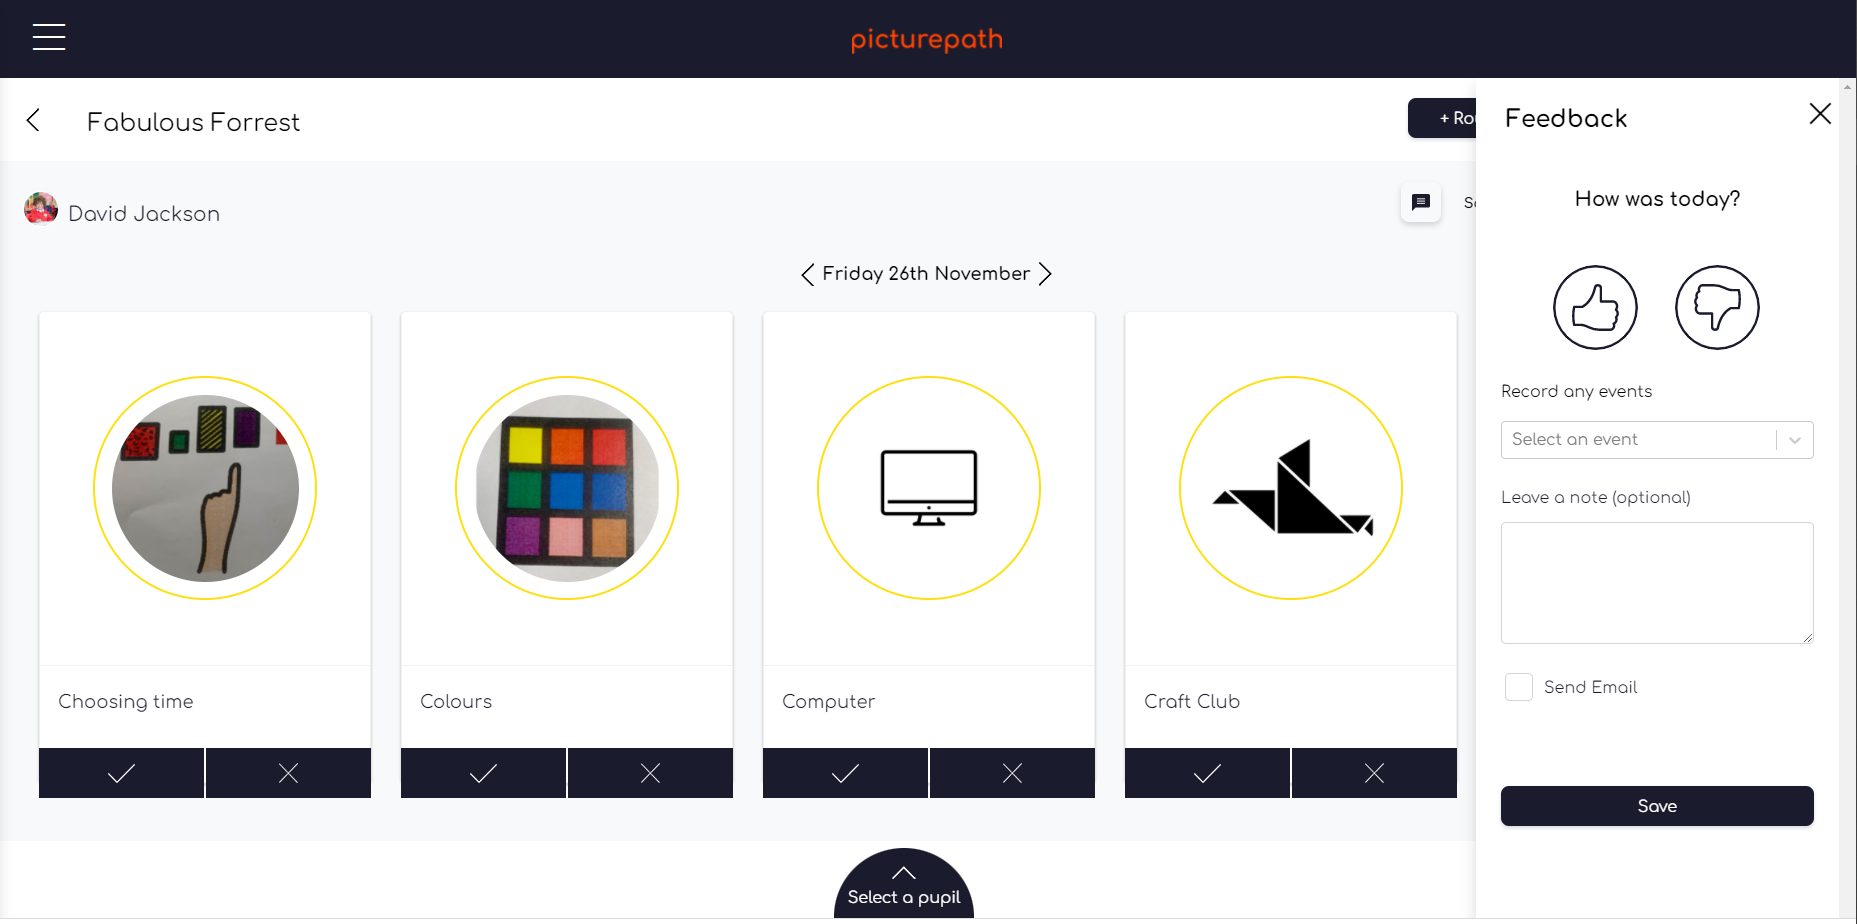
The objective of the feedback panel is to allow the Teacher Login to give an assessment of the day with commentary of how well the day went. Feedback can be sent to parents via email, but is deliberately designed to push feedback to parents without providing a forum for two way conversations. All information recorded in the feedback panel feeds into the pupil’s dashboard.
Within the Pupil’s Timeline the teacher login can use the comment button to open up the feedback panel and record:
- Good Day / Bad Day – Thumb up or Thumb down
- Record any events (Meltdown, Sleepy, Sensory Seeking) – A drop down list to select the event. (let us know if we can add more events for you)
- Record any commentary on the day – Free text field
- You can send the comments and the Good Day / Bad Day via email. This is useful if you want to share feedback with the parents. – Send email check box
5. Pupil Timeline (admin view)
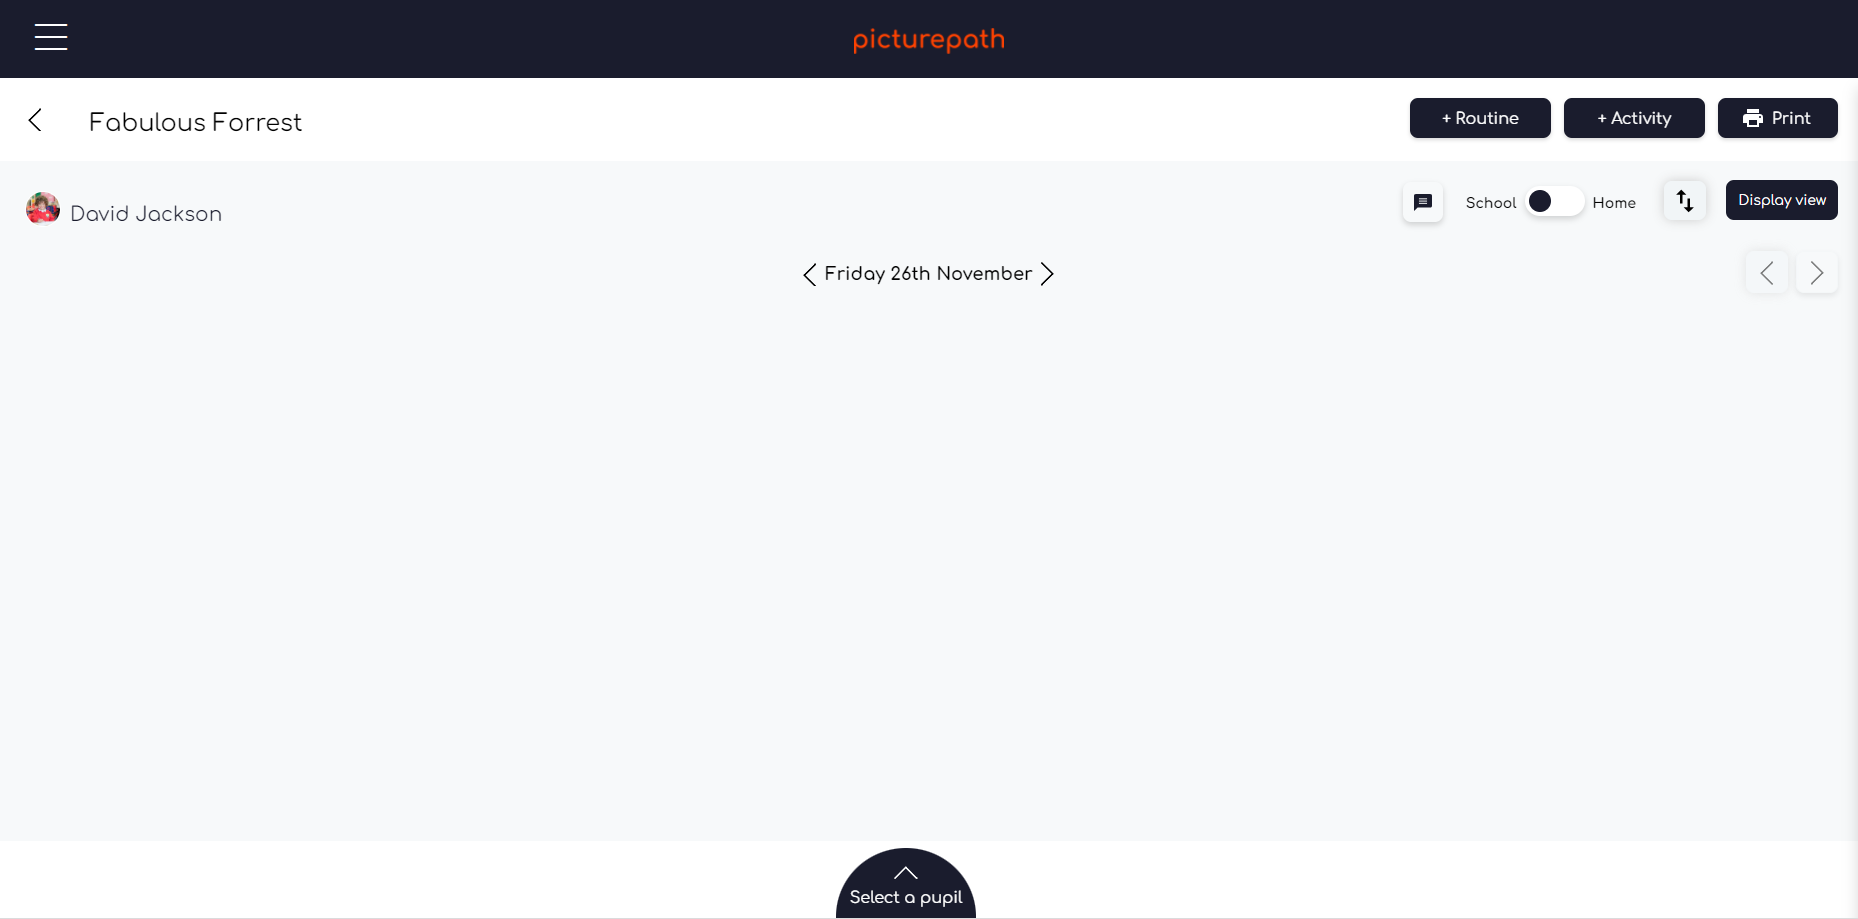
By default the pupil timeline will be empty. The primary objective of this screen is to allow the school staff to create a timeline for a Pupil.
From this screen you can:
- Add a routine – +Routine button (top right)
- Add an activity – + Activity button (top right)
- Print – Top right
- Enter Display View
- Move to Vertical view change back to horizontal view
6. Add Routine
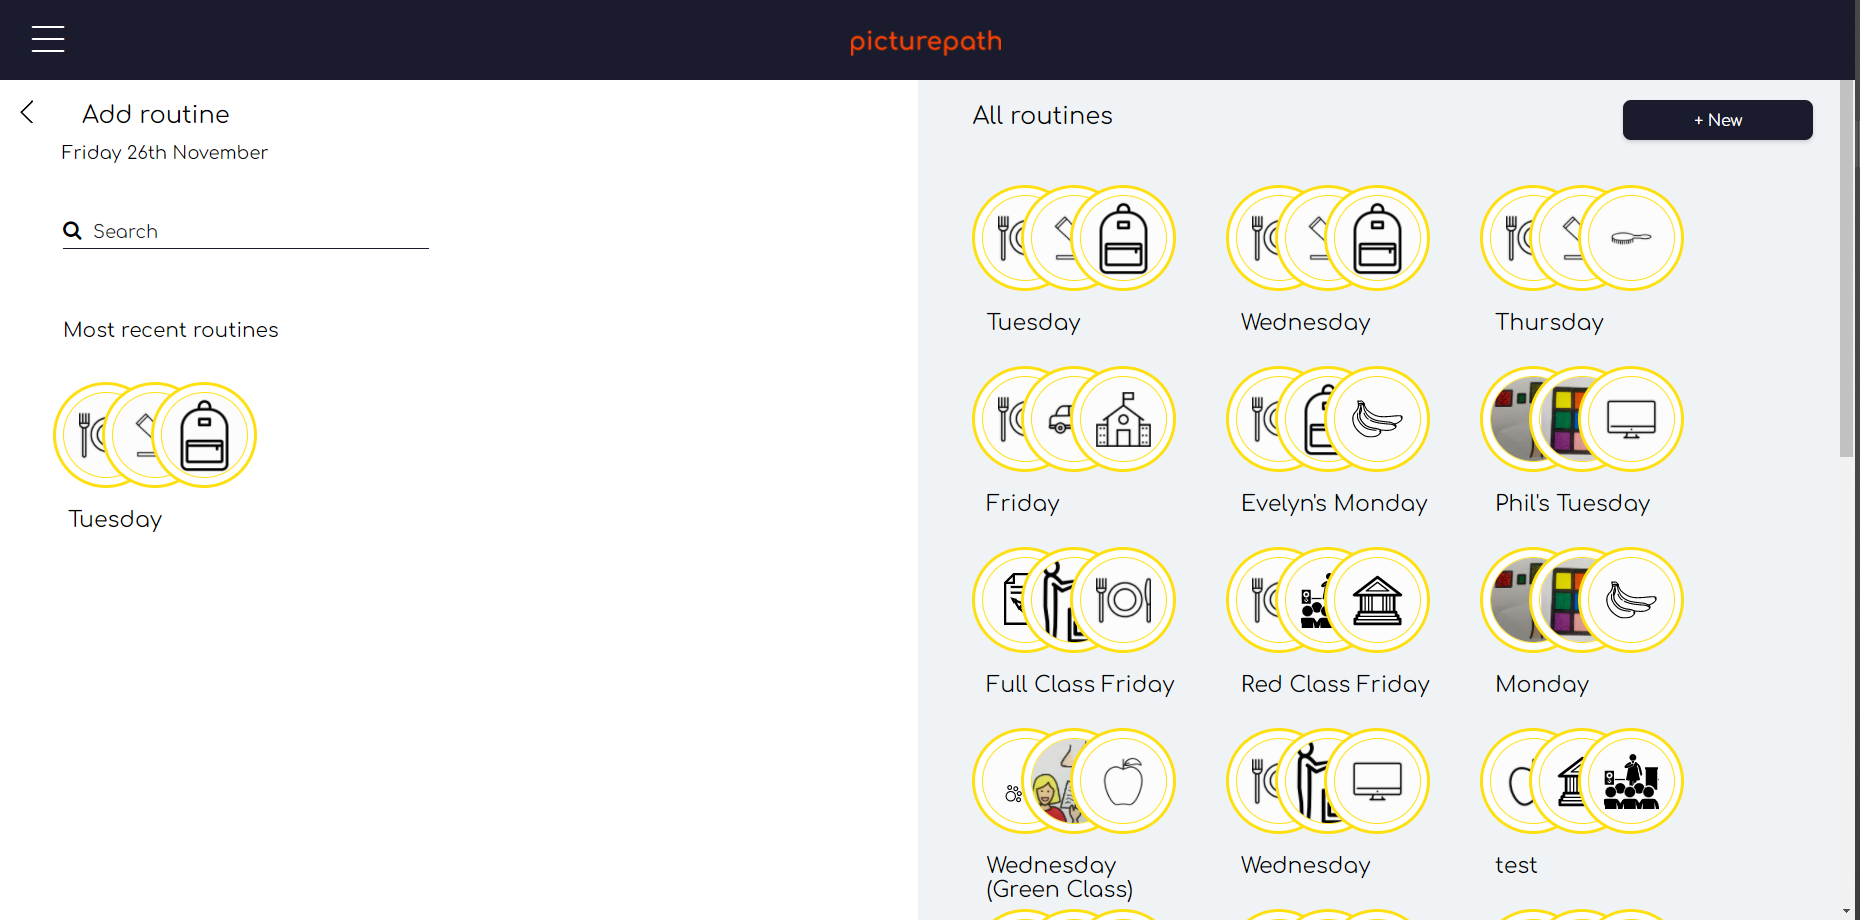
The objective of this screen is to support teachers with adding routines for classes or pupils. A routine is a group of activities which can be populated for a single day or scheduled to appear daily, weekly or every two weeks.
From this screen you can:
- Add the most recent routine
- Search & Select an existing routine
- Create a new routine
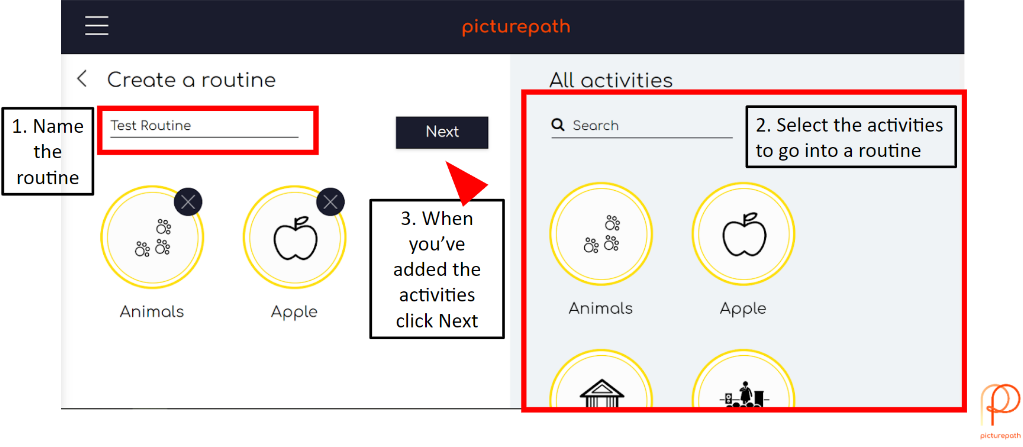
Creating a routine
7. Scheduling a routine
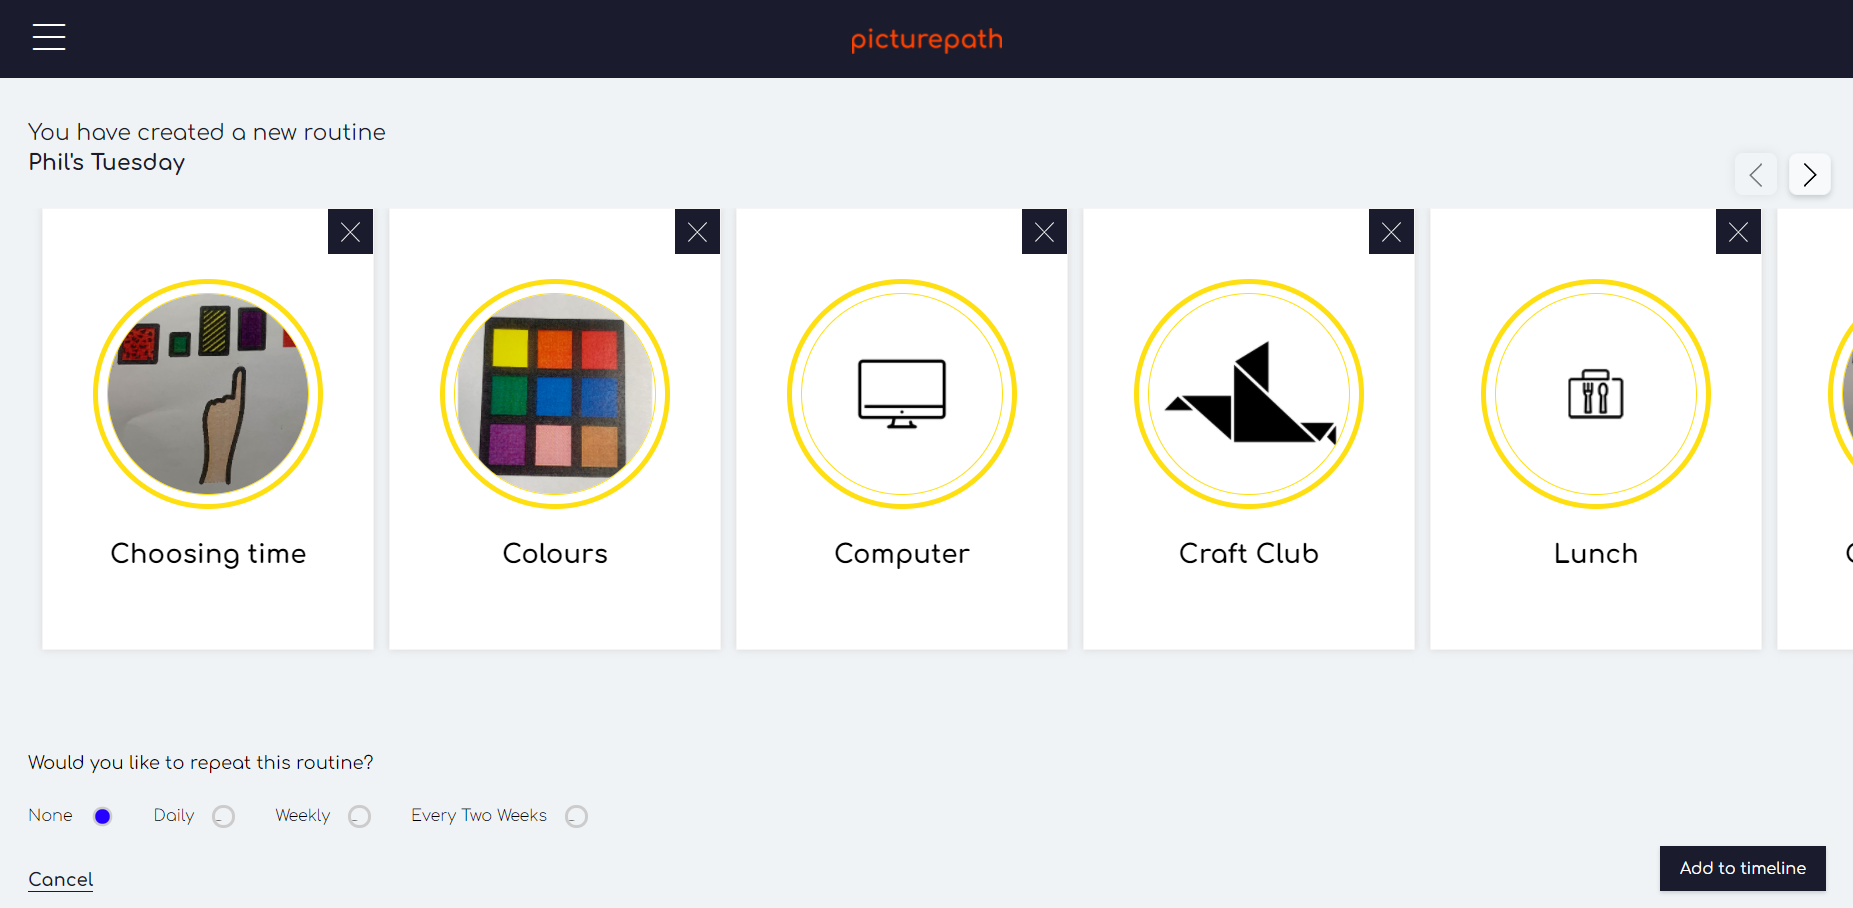
The objective of this screen is to allow the teacher login to choose the frequency and the number of weeks you would like the routine to be in place for:
Options including:
- Repeat daily
- Repeat weekly
- Repeat every two weeks
The teacher login can then choose how many weeks a routine will repeat for (a minimum of 1 and a maximum of 8) – allowing you to schedule multiple weeks’ lessons at the same time.
8. Pupil timeline (admin view)
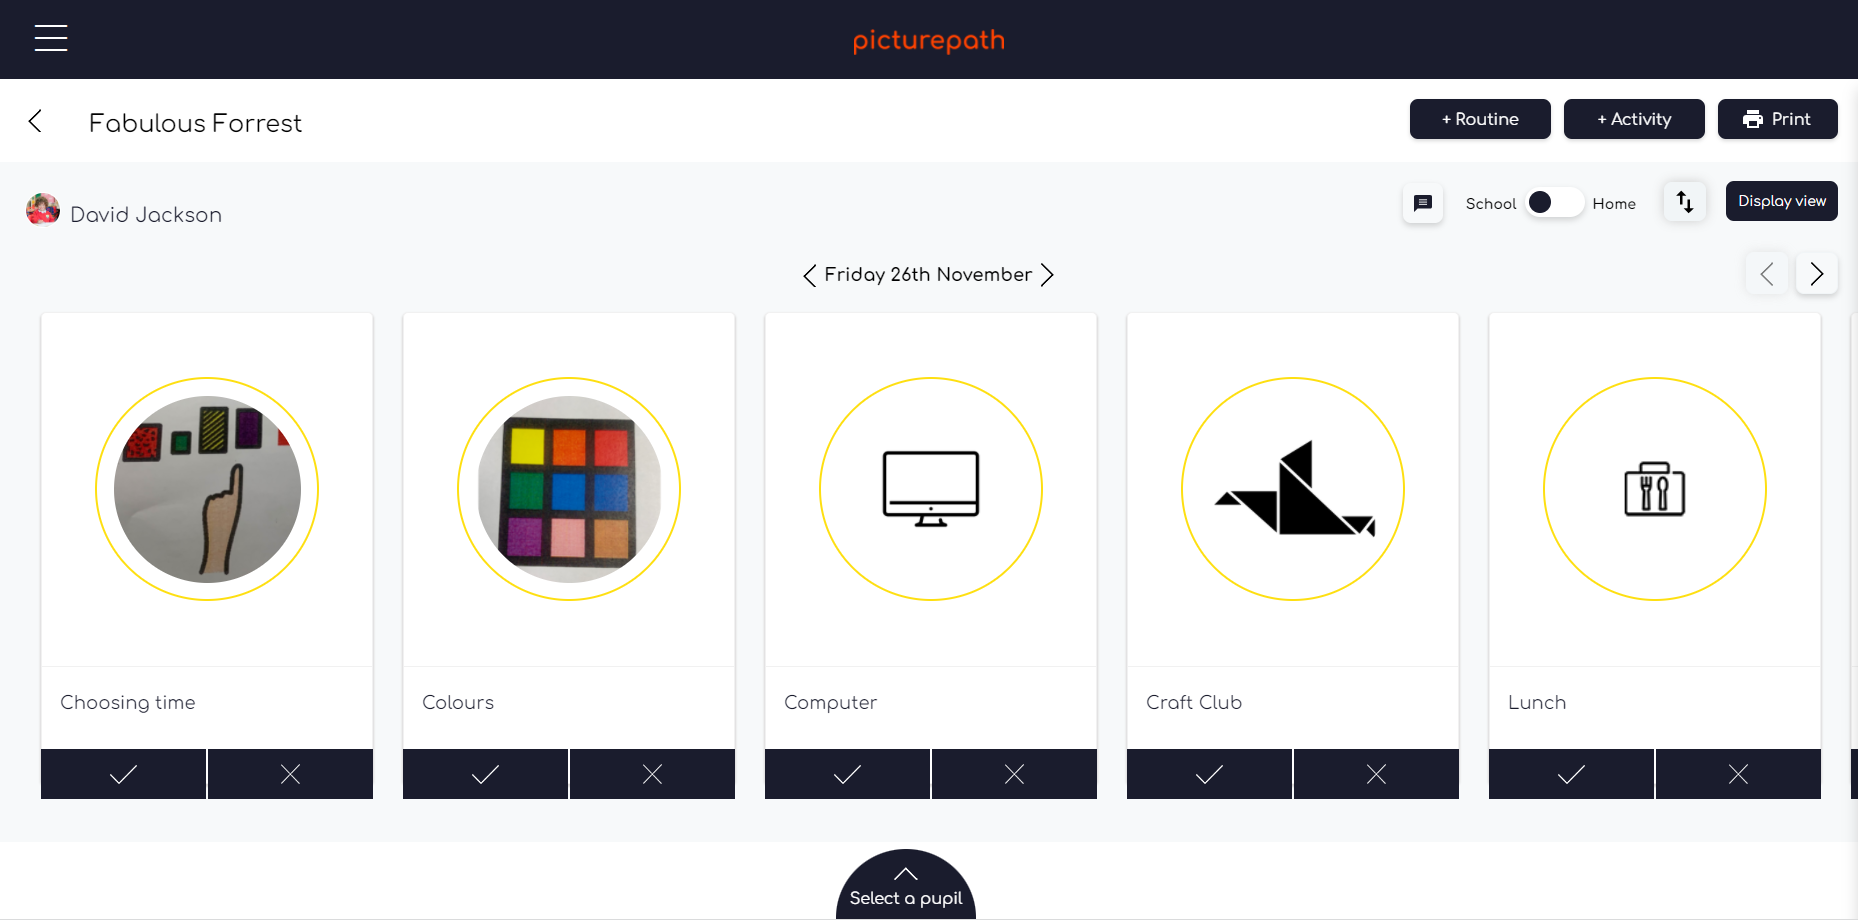
The objective of this screen is to allow the teacher login to set up the daily timeline for a child.
From this screen you can:
- Tick off or delete activities from that day
- Add a routine to the timeline
- Add an activity from a timeline
- Print the screen
- Move to Pupil Display view
9. Pupil Timeline (Pupil View – Now & Next)
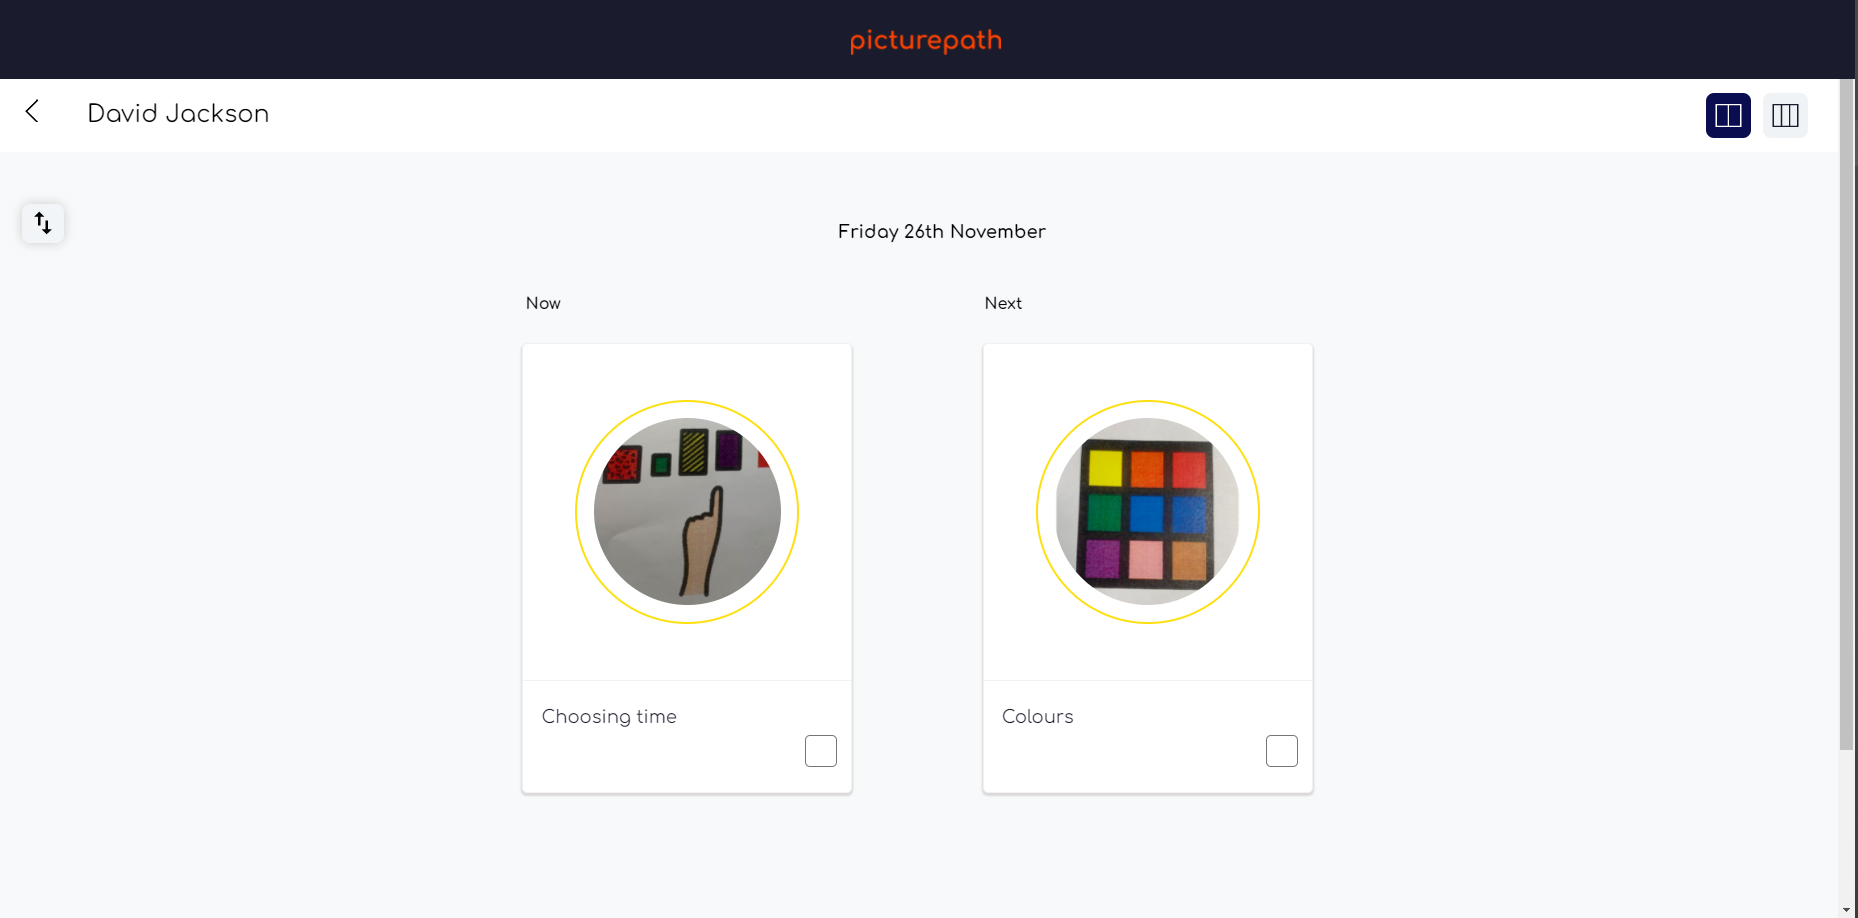
The objective of this screen is to represent the use of “Now & Next” digitally in order to keep the pupil focused on the tasks at hand.
From this screen you can:
- Move between horizontal and vertical view using the arrow symbol
- Move between full timeline and now and next using the button in the top right corner
- Tick off activities
- Mark an activity as Smiley or Sad face (this feeds into the dashboard)
10. Pupil Timeline (Pupil View – Full timeline (horizontal))
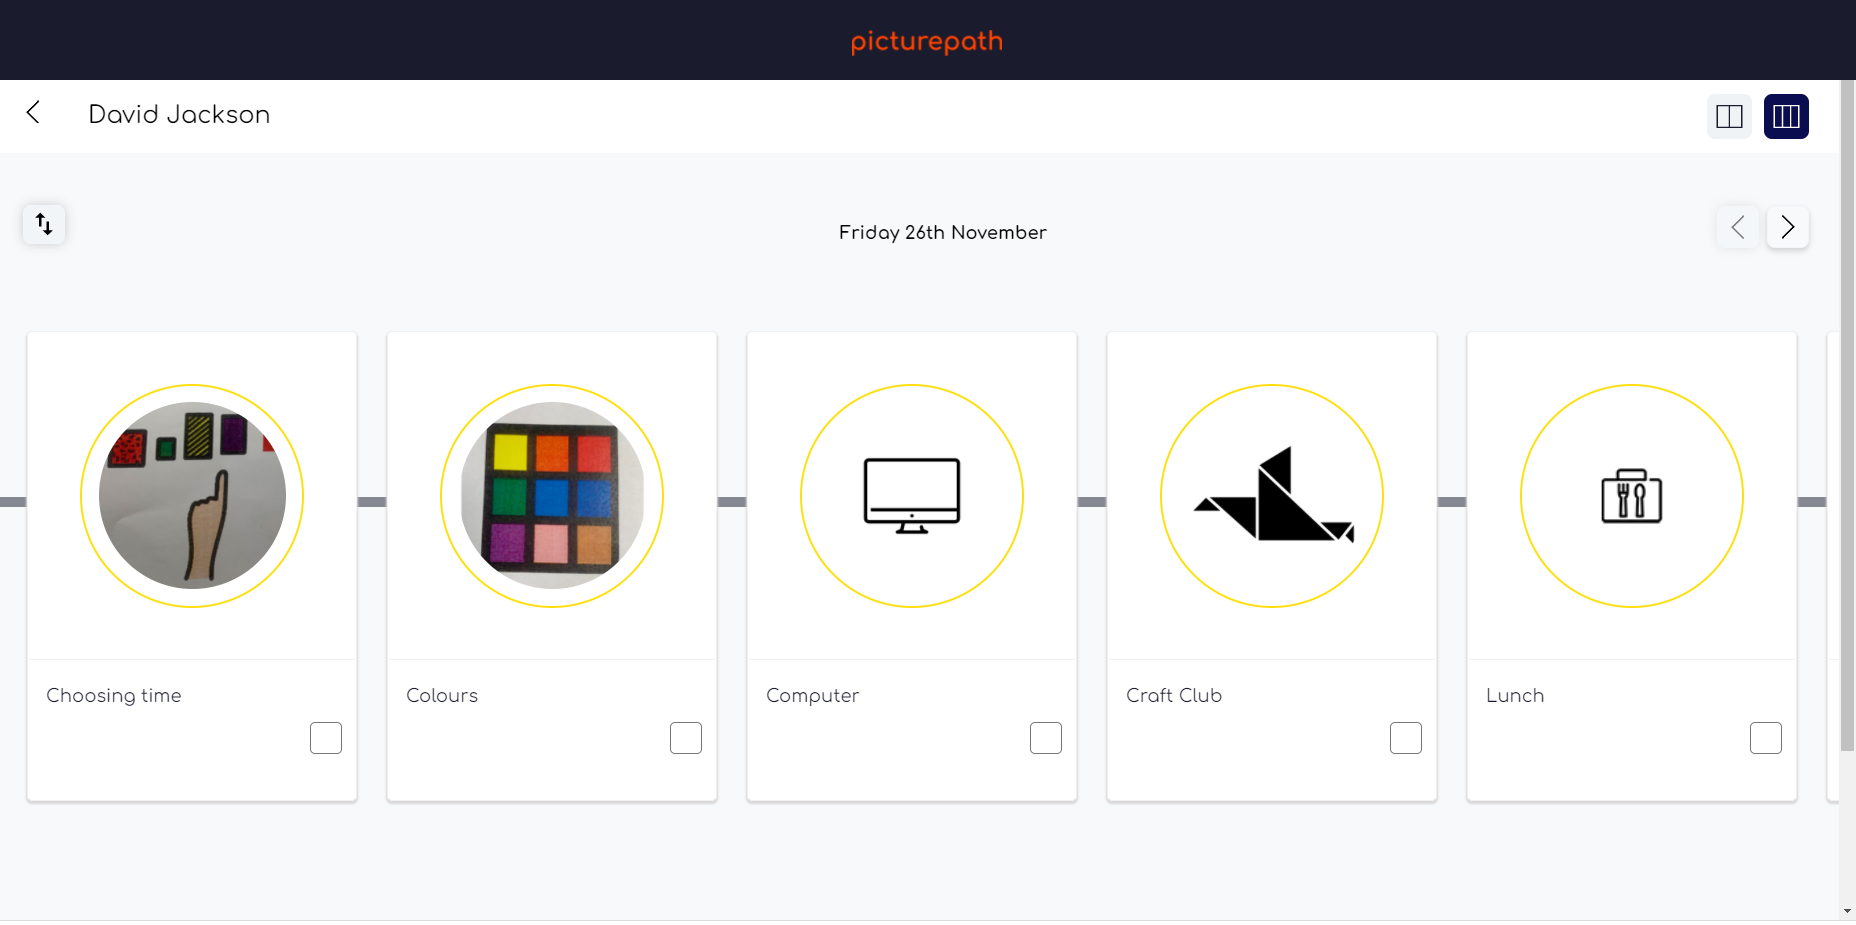
From this screen you can:
- Move between horizontal and vertical view using the arrow symbol
- Move between full timeline and now and next using the button in the top right corner
- Tick off activities
- Mark an activity as Smiley or Sad face (this feeds into the dashboard)
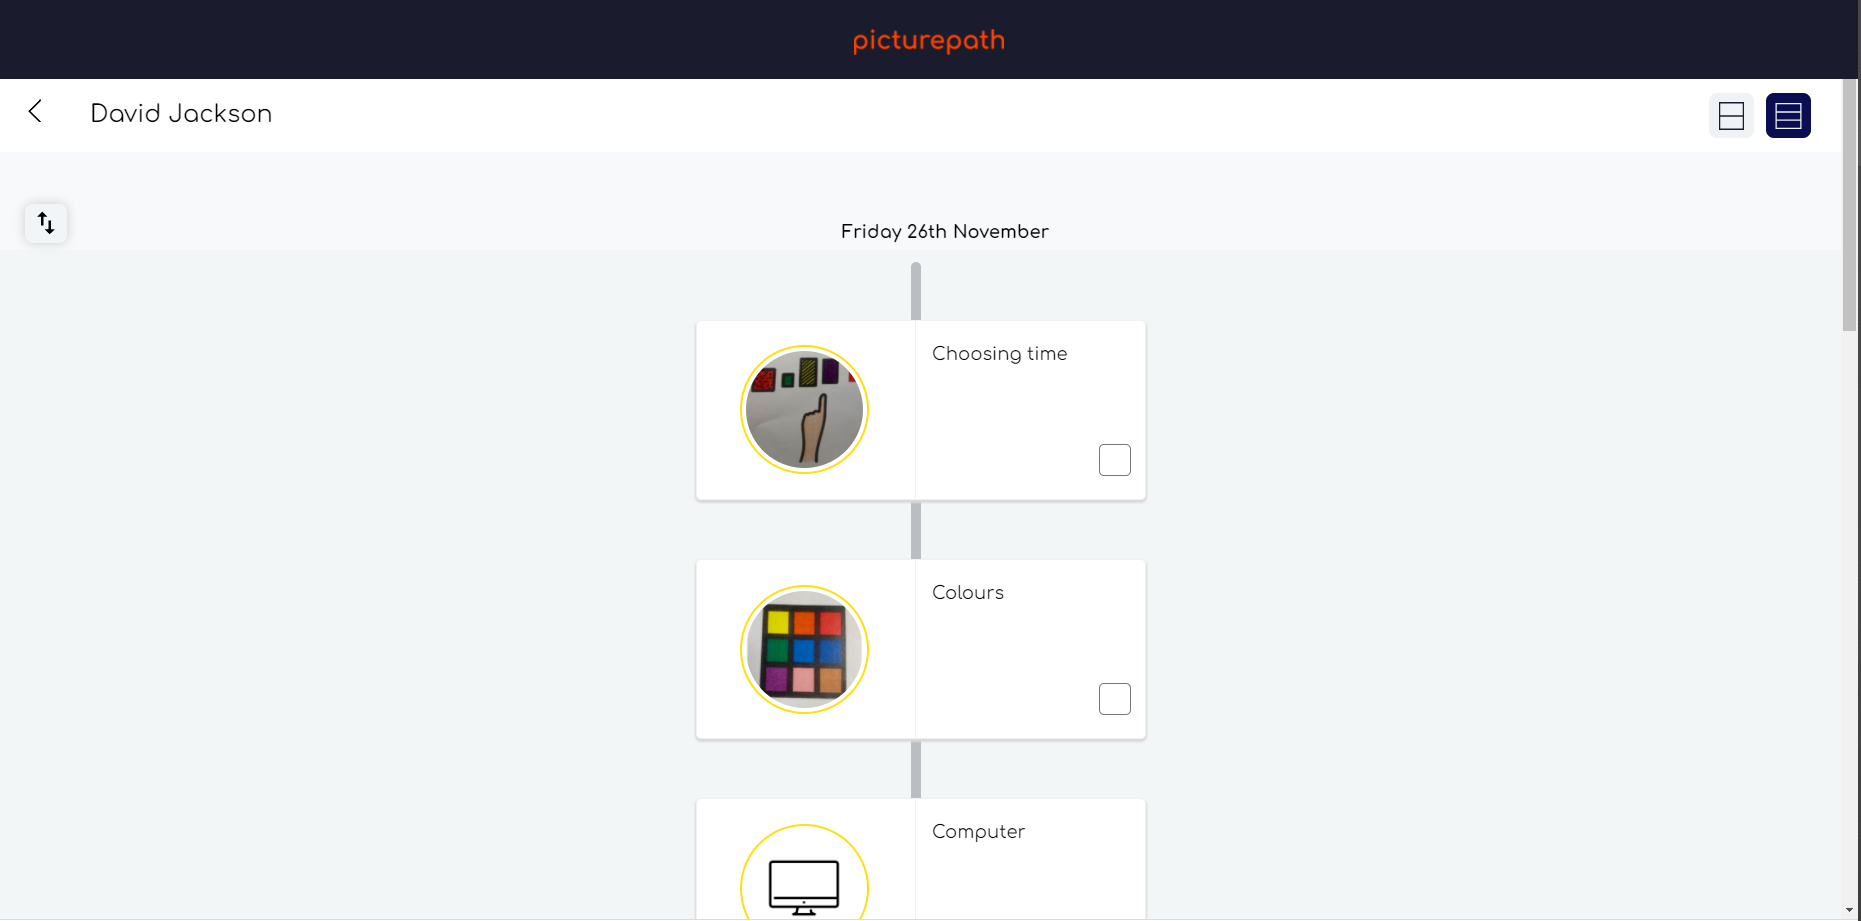
11. Pupil Timeline (Pupil View – Full timeline (vertical))
12. Pupils Screen
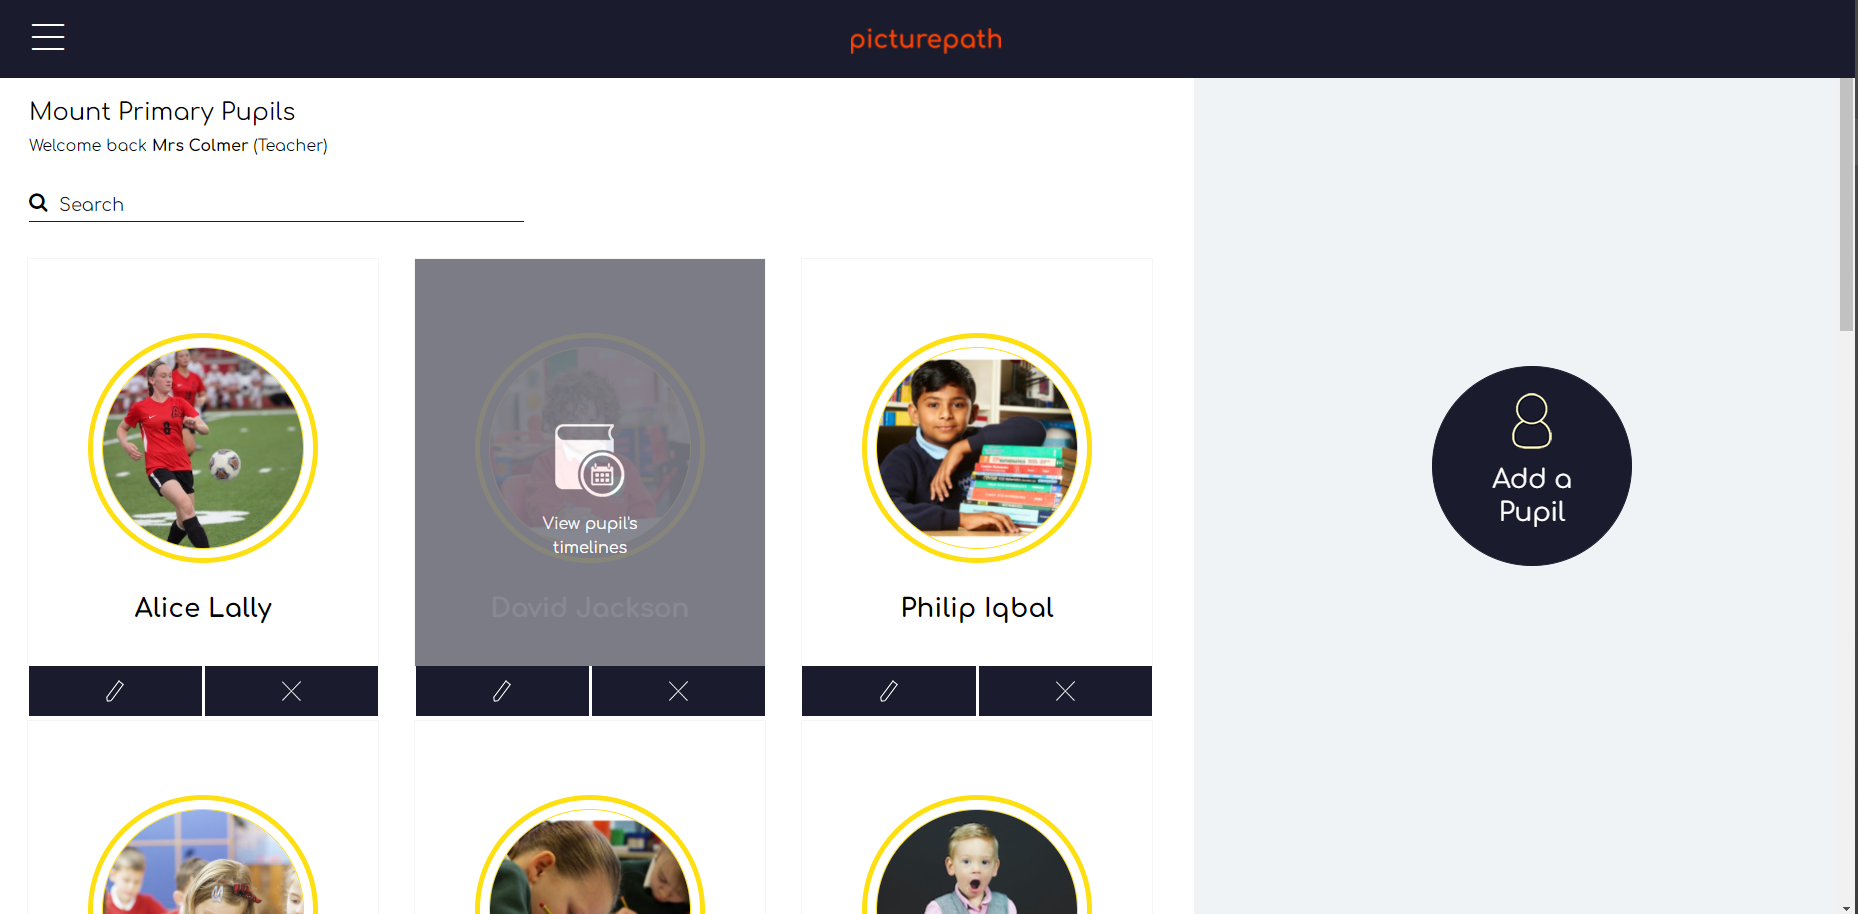
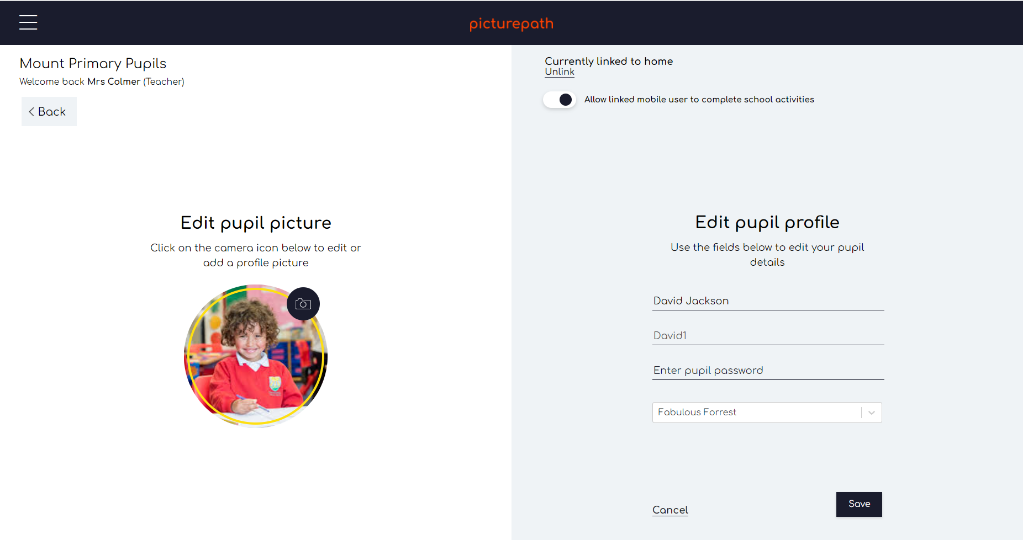
The objective of this screen is to support the management of the pupil.
From this screen you can:
- Add / Change the image for a pupil
- Create a username / update a password for the child
- Change which class a student is in
- Where a child is linked to their parents mobile app, allow or stop them from ticking the activities off from the parent login.
- Where the pupil is not linked to the parent app you can invite the parent to use picturepath and link between timelines.
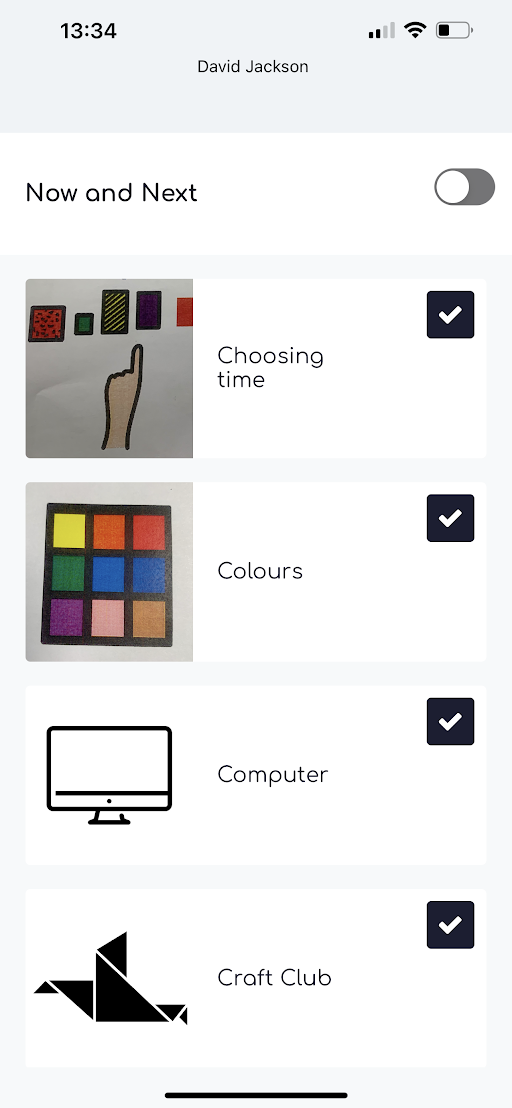
NB: Login details:
Login details created in picturepath can be used for users to access the school timeline on the Web OR login as a pupil on the mobile app. The image to the right is how the timeline will look for the pupil.
13. Activities Screen
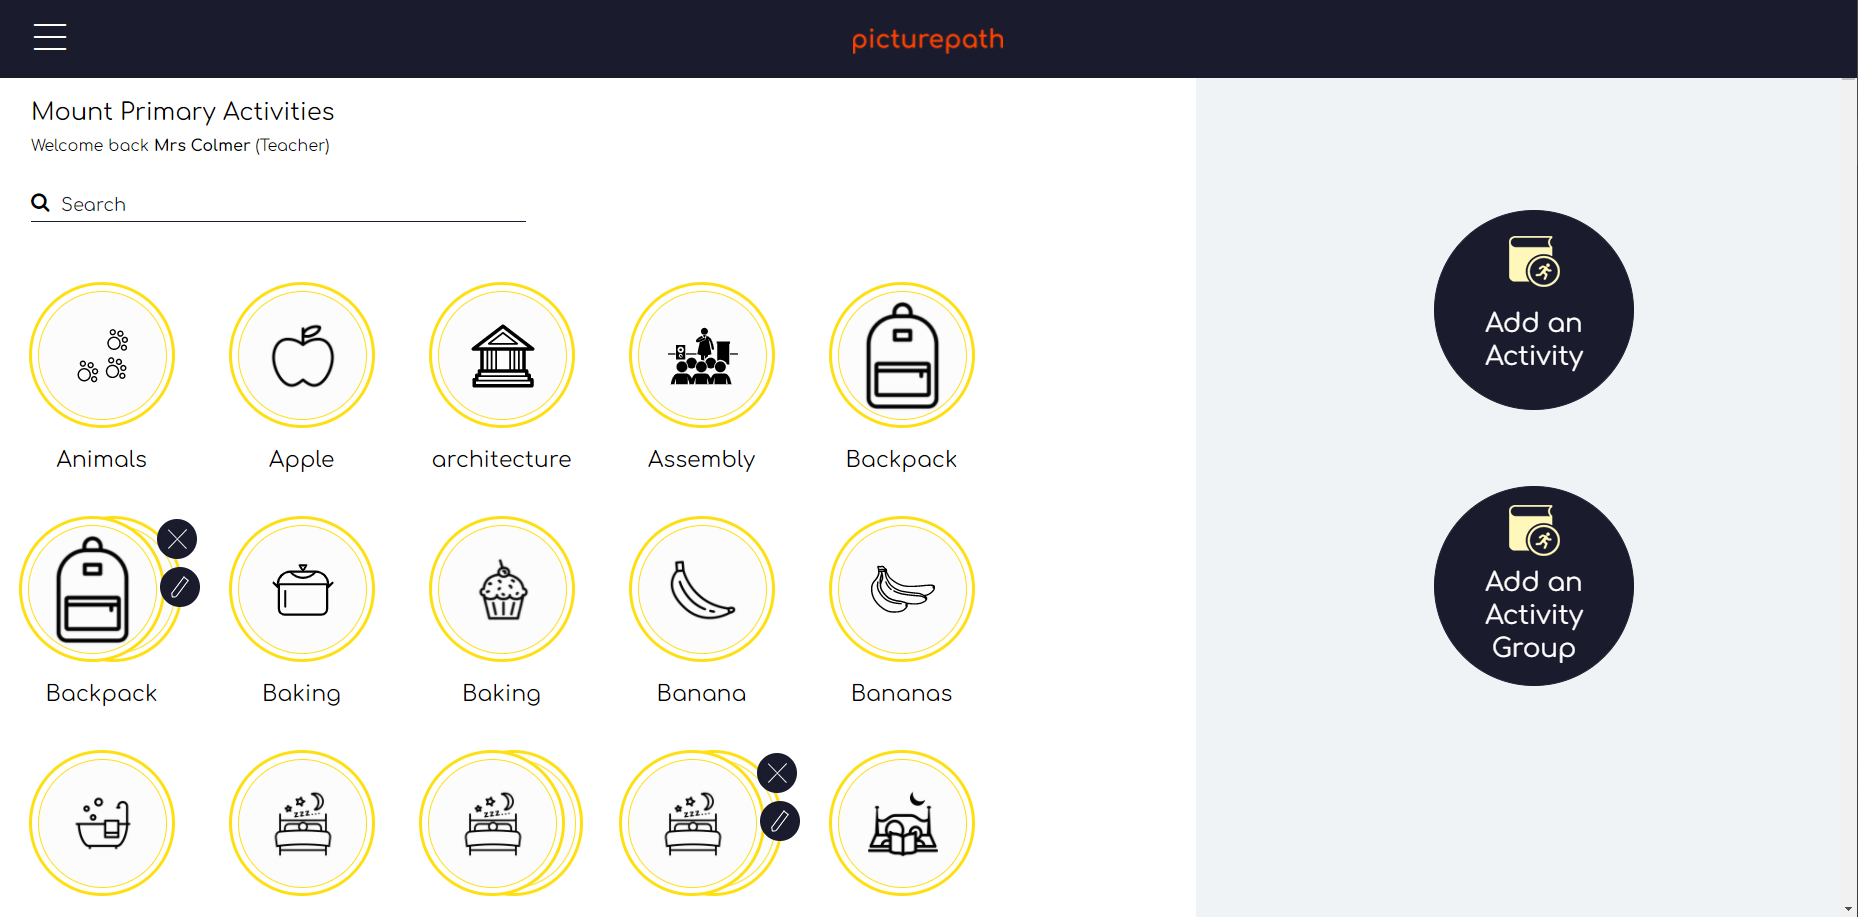
The objective of this screen is the management of a library for activities for the children.
From this screen you can:
- Search and review activities that the school has uploaded
- Add a single Activity
- Add an Activity Group
- Delete / Edit activities you have created
14. Add New Activity Screen
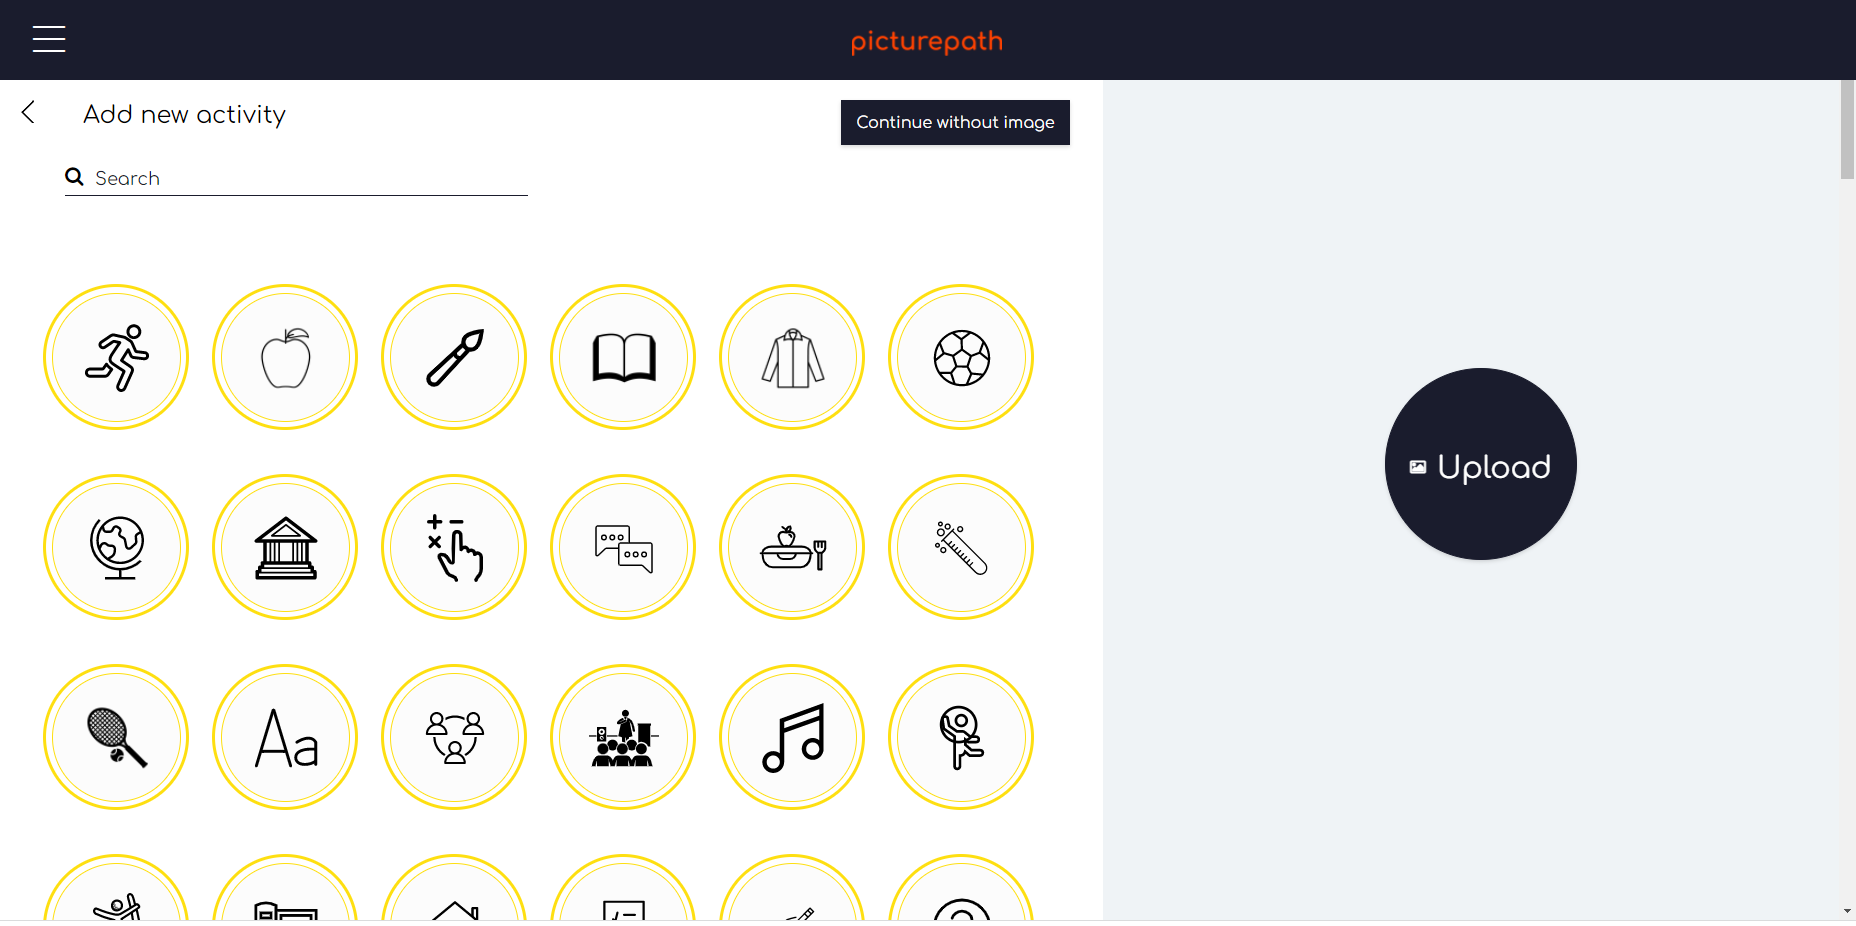
The objective of this screen is to create activities that can be accessed via the school library. When creating an activity you can select an icon from an icon library, choose to continue without the image or upload your own images.
From this screen you can:
- Search and select an icon
- Upload your own image
- Continue without an image
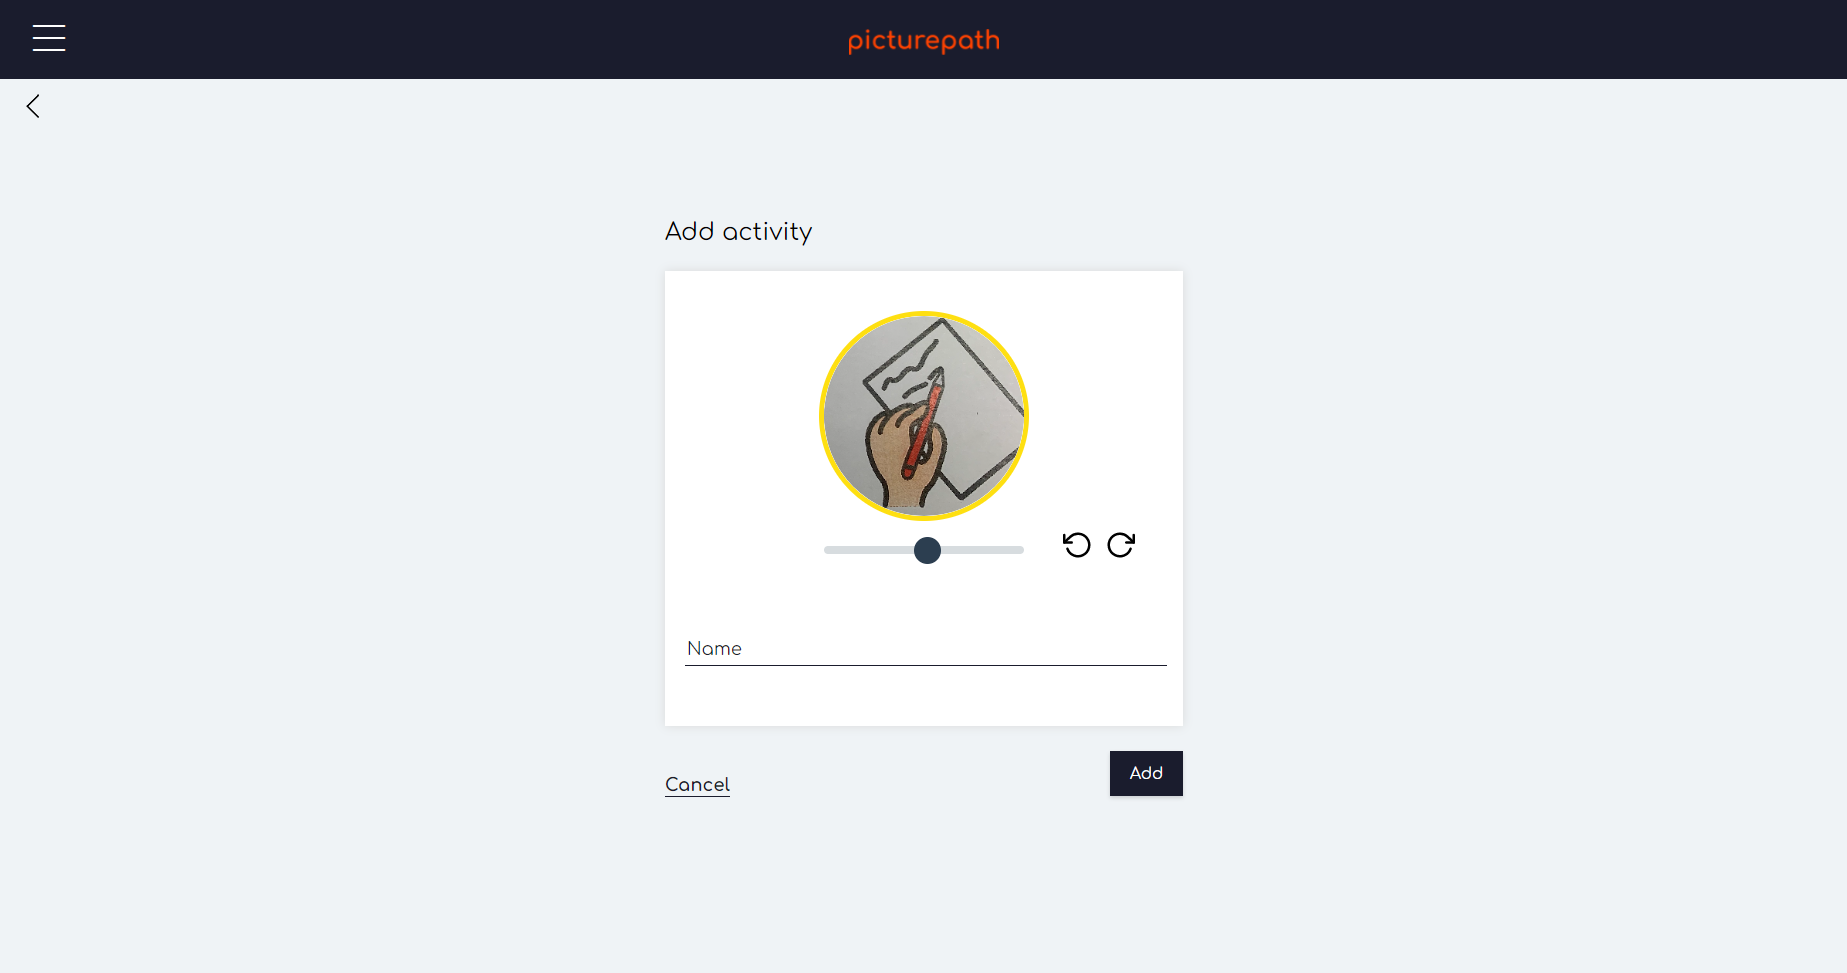
Name your activity and add the activity.
15. Routines Screen
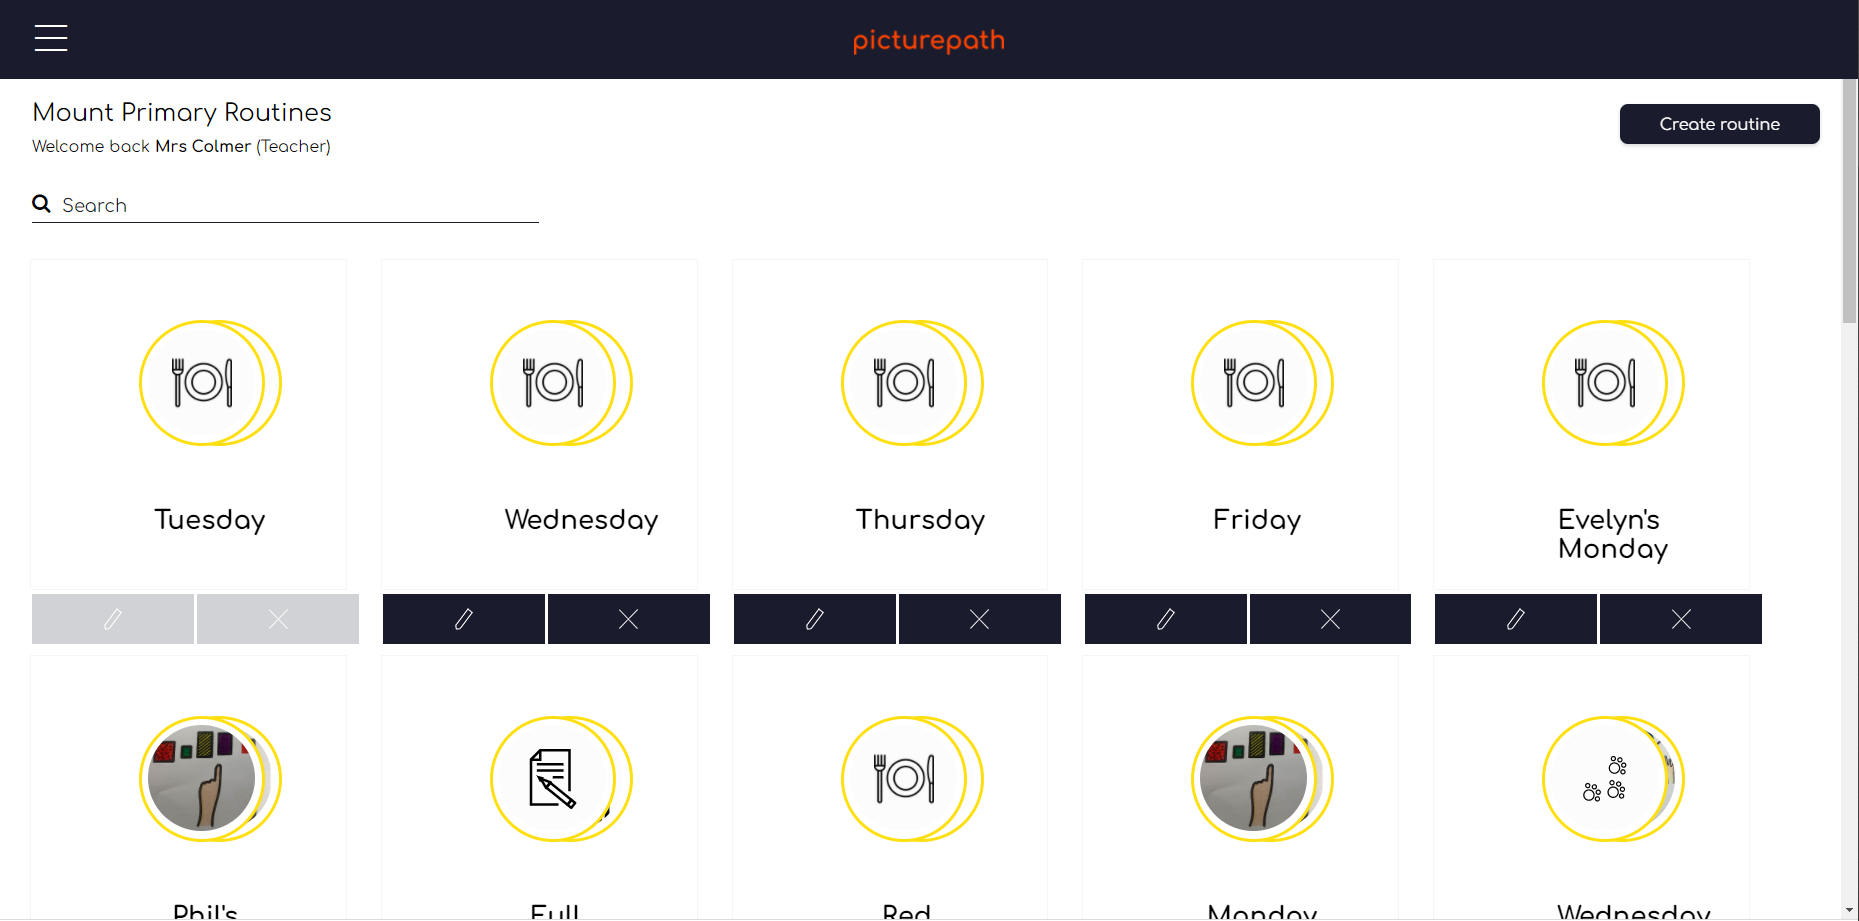
The objective of this screen is to keep a library of routines which can be added to class or pupil timelines. A group of a number of activities which can be added to the timeline for that day or scheduled across a number of days and / or weeks.
From this screen you can:
- Create a routine
- Edit or delete routines which you have created
- View a routine
16. View Routine
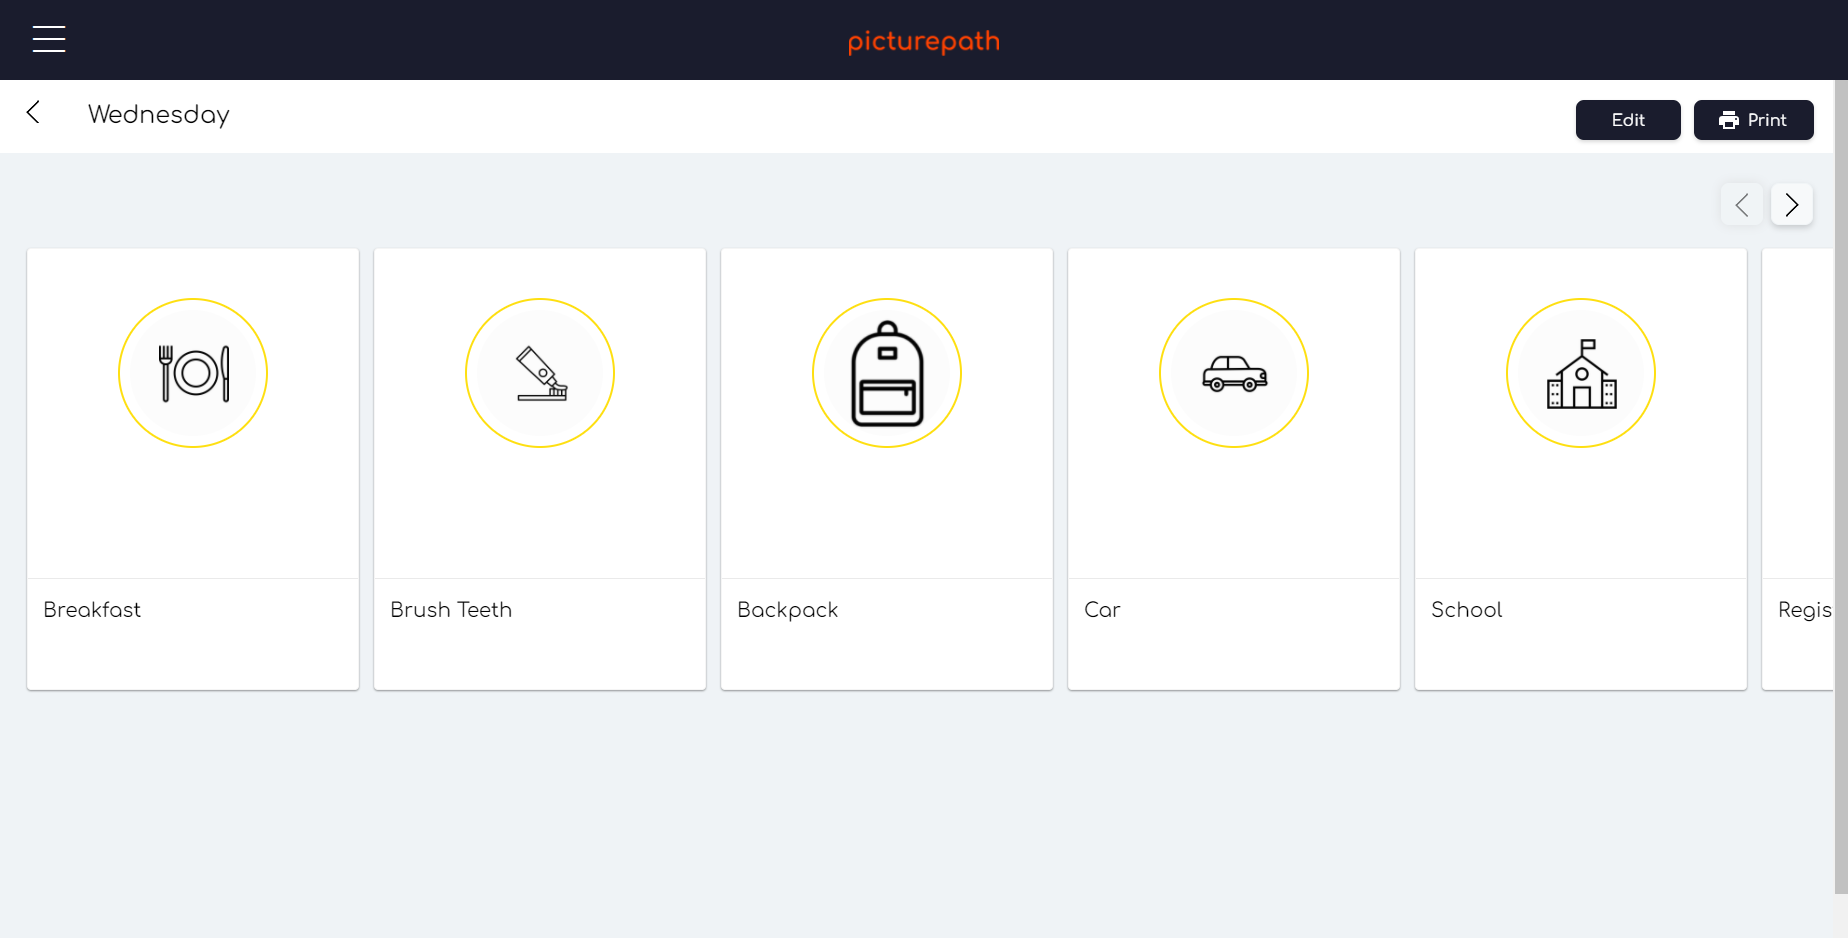
From this screen you can:
- Edit the activity
- Print the routine
17. Edit Routine
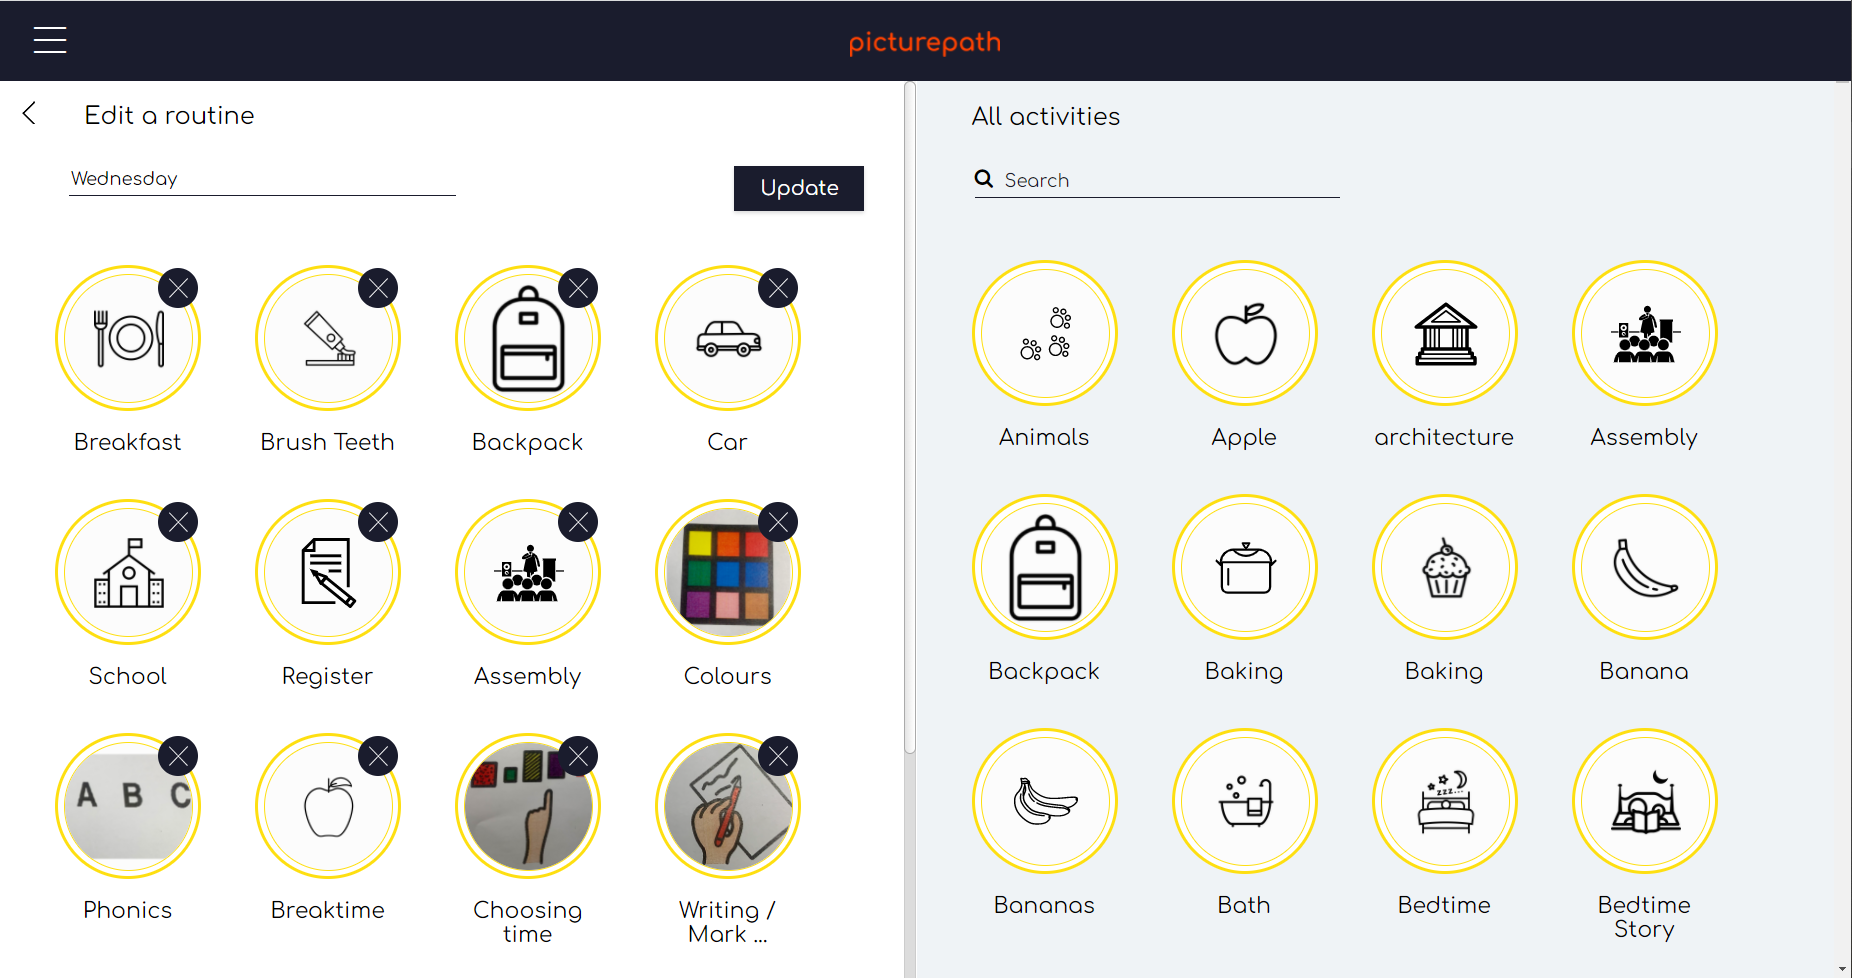
From this screen you can:
- Remove or add activities to your routine
- Update the routine in line with this
18. Settings Screen
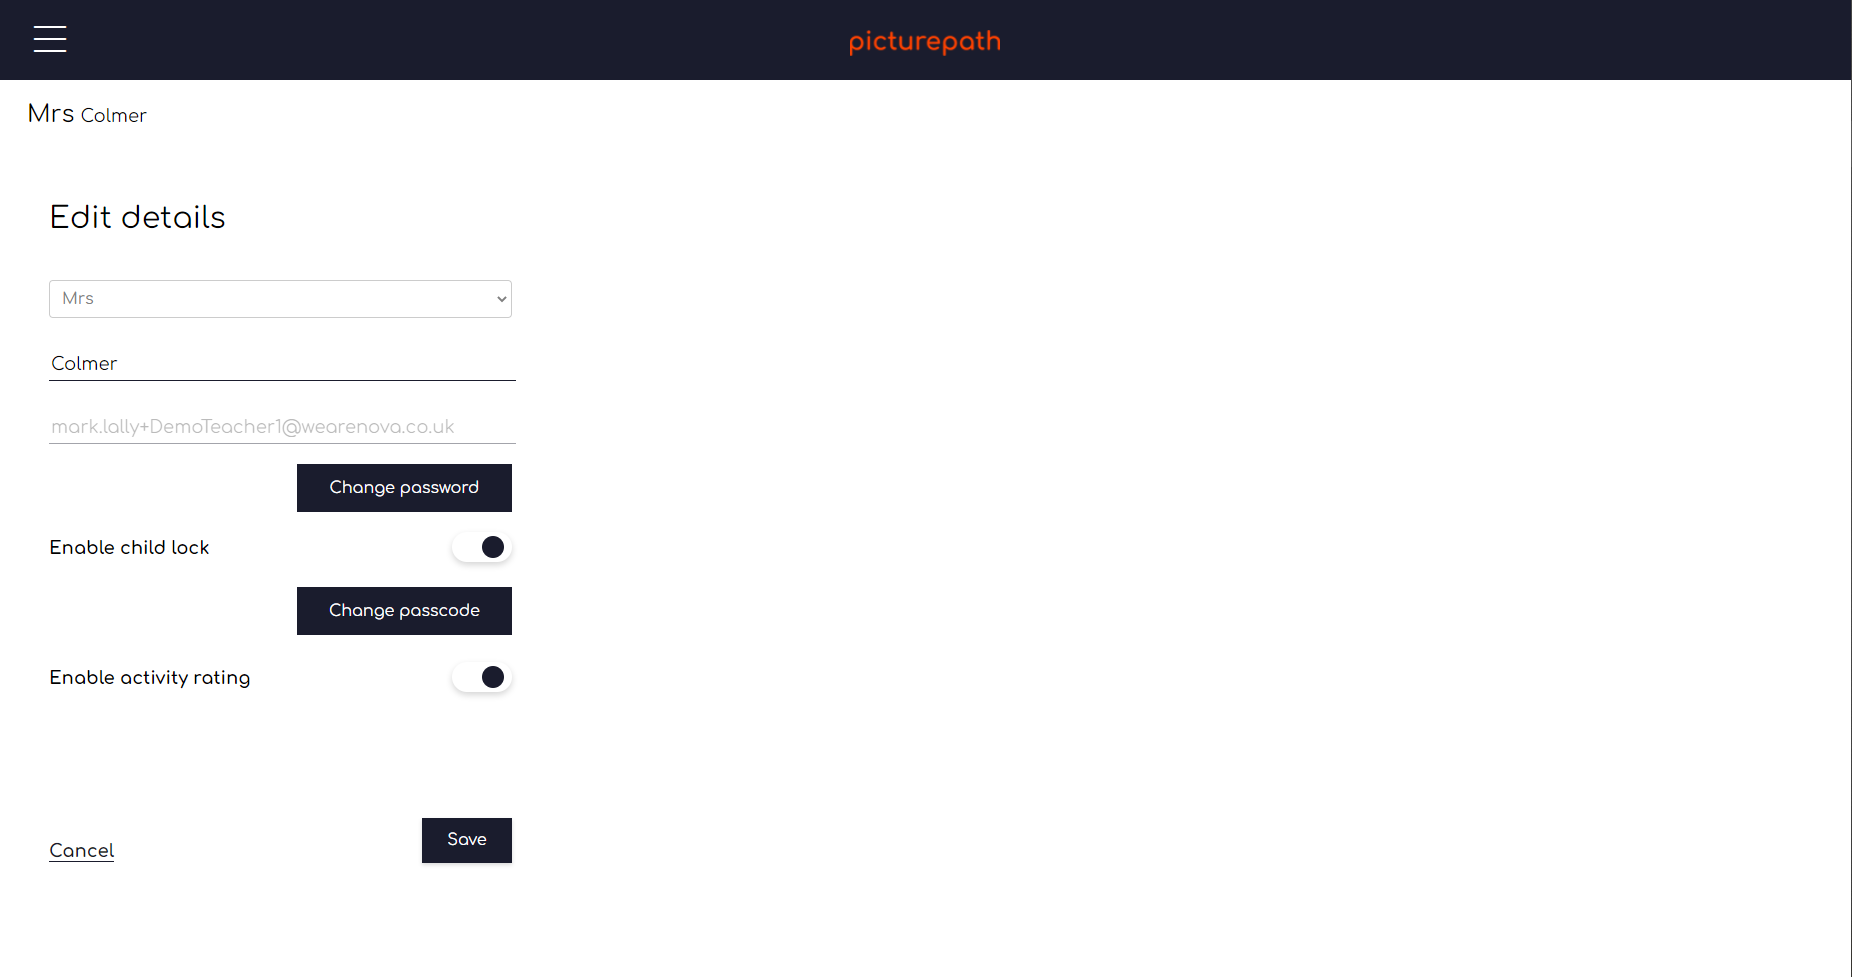
The objective of this screen is to give the logged in user access to the administration tools within the application
From this screen you can:
- Change the title recorded for you
- Change name
- Change your password
- Enable Child lock. This will put a 4 digit passcode between the Display View and the admin view which stops the pupil from getting into the administration functionality.
19. Passcode Screen
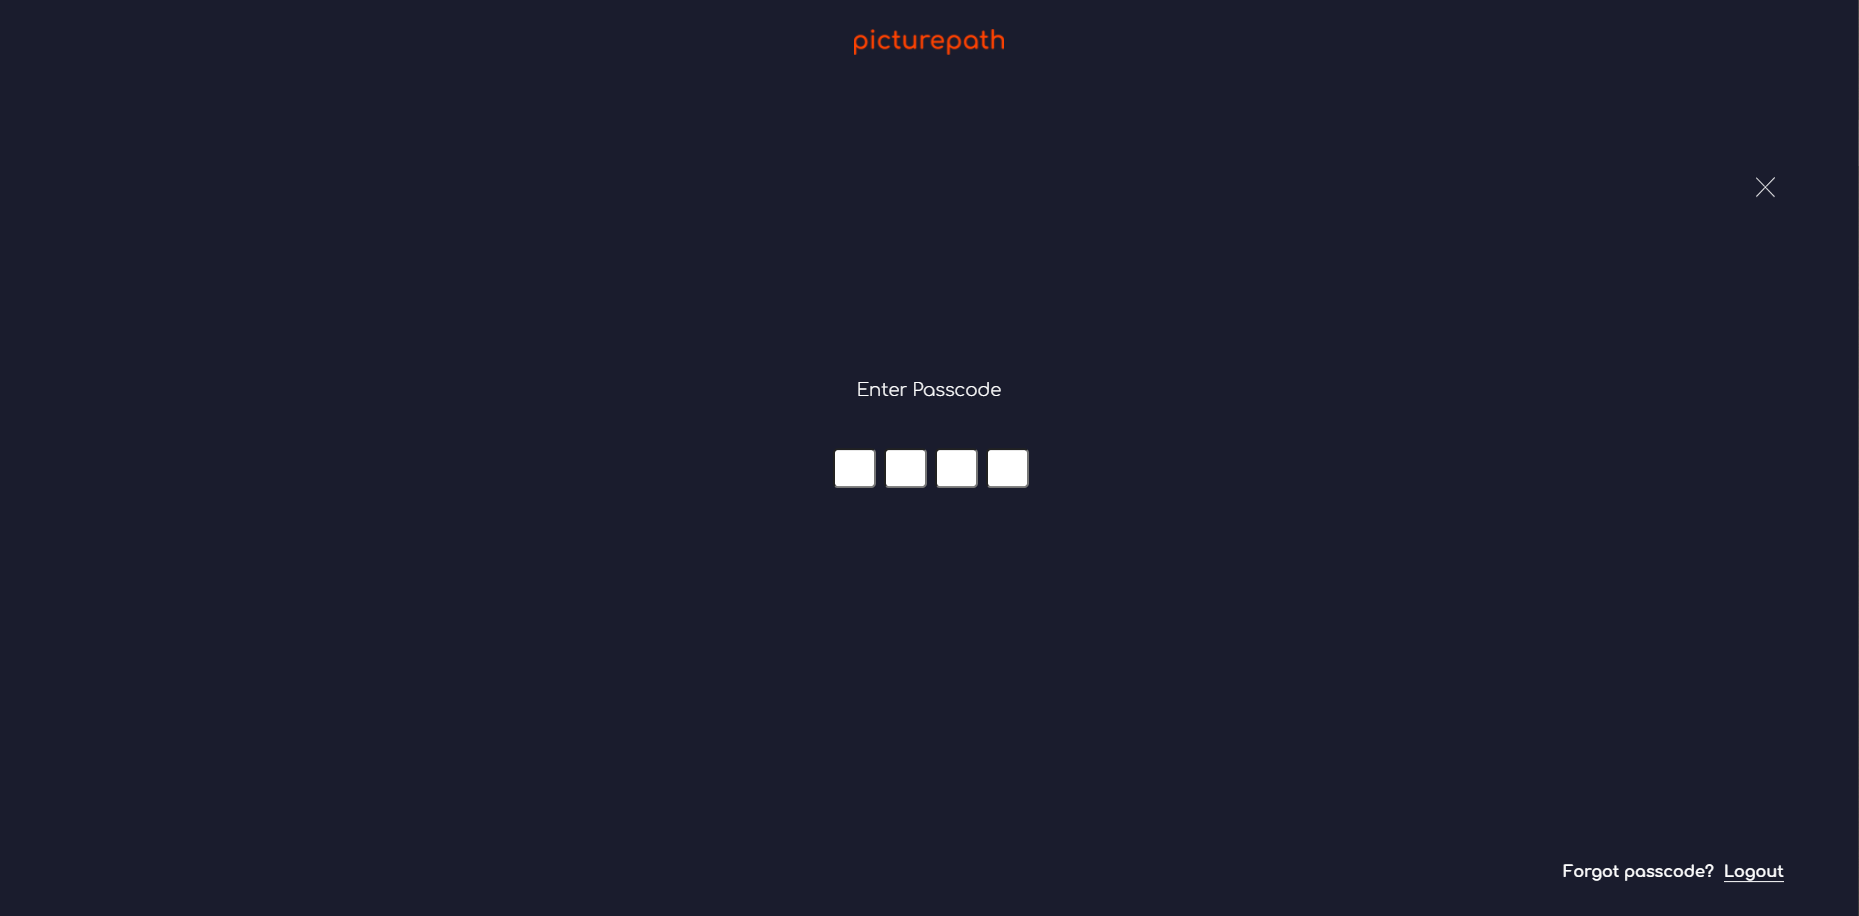
Objective of this screen is to stop pupils from being able enter the admin screen if they are using the app on your login.
From this screen, you can:
- Cancel using X and move back to the display screen
- Enter the passcode to move to admin features
- Logout in case you have forgotten the passcode
20. How to videos
Follow the videos below where picturepath founder, Richard Nurse, will take you through the functions needed to get started with your digital visual timeline.
